
Create a Windows 10 Recovery Key for Mesa 3 or Mesa 2
This article explains how to recover a crashed Mesa by creating a Windows 10 recovery key and customizing the OS installation by applying the current Juniper Systems OS patch.
WARNING: Always back up your files. This recovery method will wipe all files and data on your device. It should only be used on a Mesa that has been backed up or cannot be recovered otherwise.
Process Overview
Some of the steps for recovering your Mesa depend on how up-to-date it was before it crashed. If the firmware (UEFI) was not up to date, the process is a bit more involved. Here's an overview:
Create a Windows 10 Recovery Key
Reinstall Windows 10 on Your Mesa
Update the UEFI (if necessary)
Reinstall Windows 10 on Your Mesa (if you updated the UEFI)
Install the Mesa Drivers Package
This order assumes that the Mesa has crashed and must be recovered before you can check the UEFI version. If your Mesa has not crashed, you could start with Check BIOS/UEFI Version, which would eliminate the need to reinstall Windows 10 twice. The UEFI must be up-to-date in order for the drivers package to install the correct drivers.
Create a Windows 10 Recovery Key
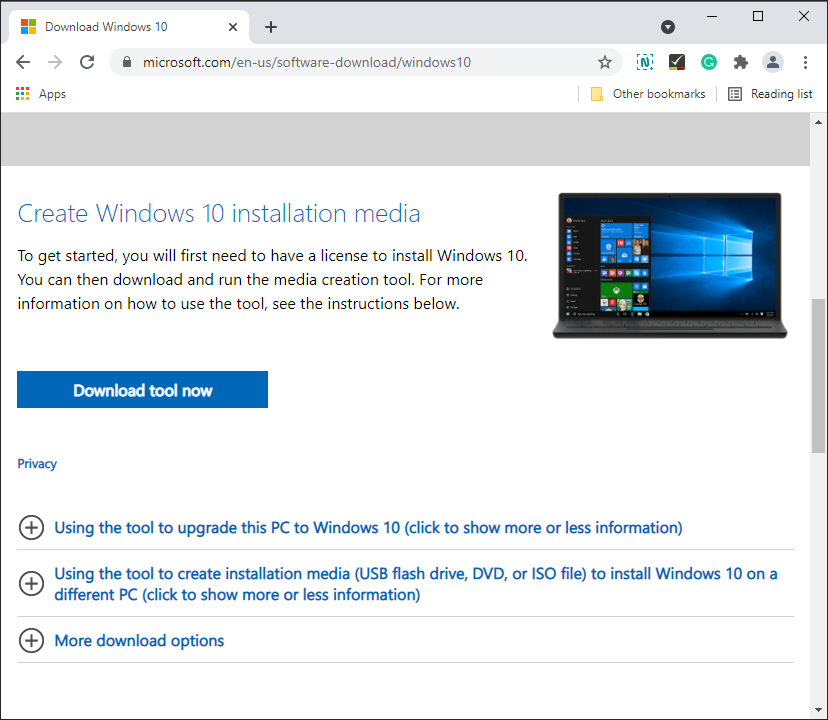
Insert a blank USB drive with at least 8G of storage into your PC.
Go to the Windows Software Download page. Scroll down to Create Windows 10 installation media.
Select Download tool now.
Open the downloaded .exe file.
Accept the licensing agreement.
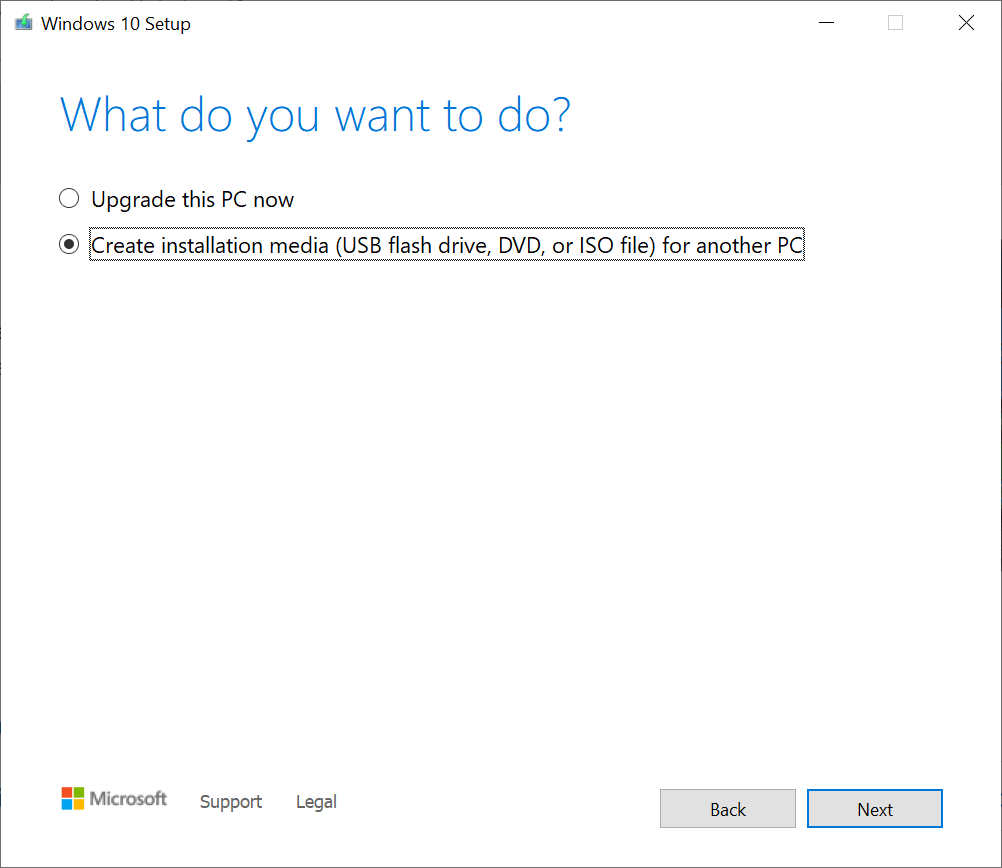
Select Create installation media for another PC then select Next.
Choose your language and verify that the 64-bit architecture is selected. Tap Next.
Select USB flash drive. Tap Next.
Select the USB drive you wish to use. Tap Next.
The creation tool will complete the process.
Once the USB recovery key has been created, keep it in a safe place so that it is available to use if ever you need to re-install Windows as explained below (which should be rare).
Reinstall Windows 10 on Your Mesa
Mesa 3
Continue to the next section for Mesa 2 instructions.
Ensure that your Mesa 3 is powered off. (If it has crashed and can't be started up again, this is okay.)
Connect the USB from the section above and a USB mouse to a USB multiplier.
Connect the USB multiplier to your Mesa.
Plug in the Mesa 3.
Press the Power and Windows buttons at the same time then release only the Power button. Continue to hold the Windows button until the Boot screen appears.
Under "Quit without saving?" select No.
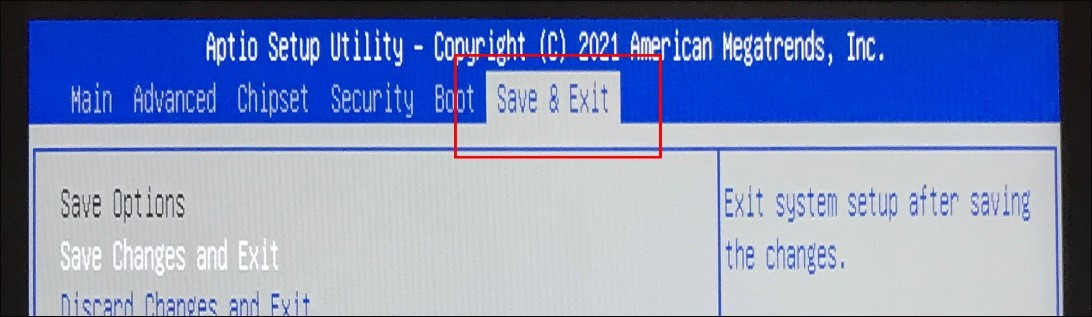
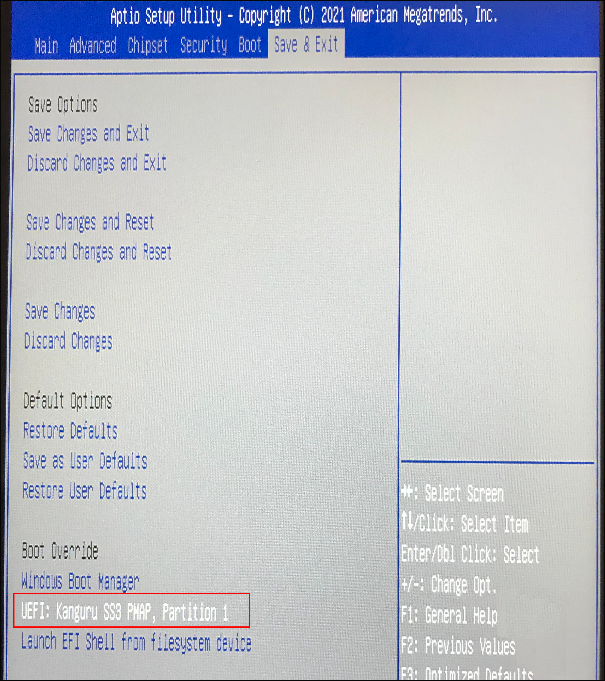
Select the Save and Exit tab.
Select UEFI: [Name of USB Drive].
Select your preferred language, time, and keyboard preferences. Tap Next.
Select Install Now.
Accept the licensing agreement and tap Next.
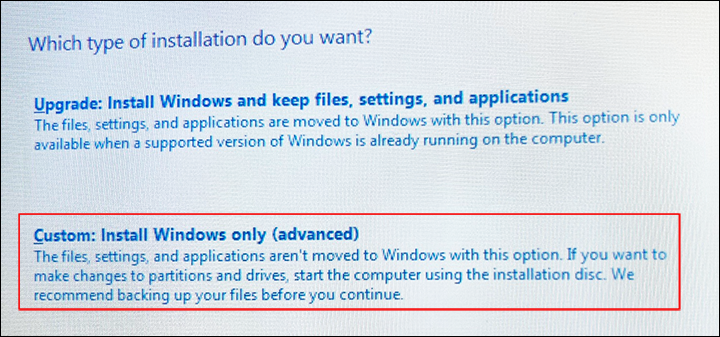
Select Custom: Install Windows only.
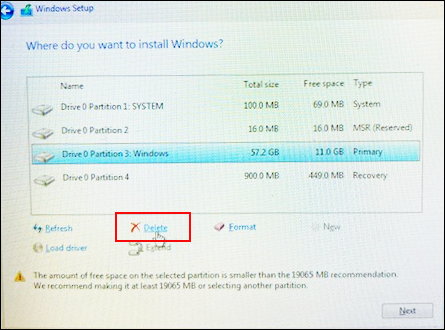
Delete all the partitions. (Windows will prevent you from deleting one of them.) Tap Next.
Windows will install. Click through all the setup screens.
Note: If you are planning to update the BIOS/UEFI version, do not connect to the internet.
Mesa 2
Ensure that your Mesa 2 is powered off. (If it has crashed and can't be started up again, this is okay.)
Connect the USB (from the Create a Windows 10 Recovery Key section) and a USB mouse to a USB multiplier.
Connect the USB multiplier to your Mesa.
Plug in the Mesa 2.
Press the Power and Windows buttons at the same time. Then release only the Power button. Continue to hold the Windows button until the Boot screen appears.
Select Boot Manager.
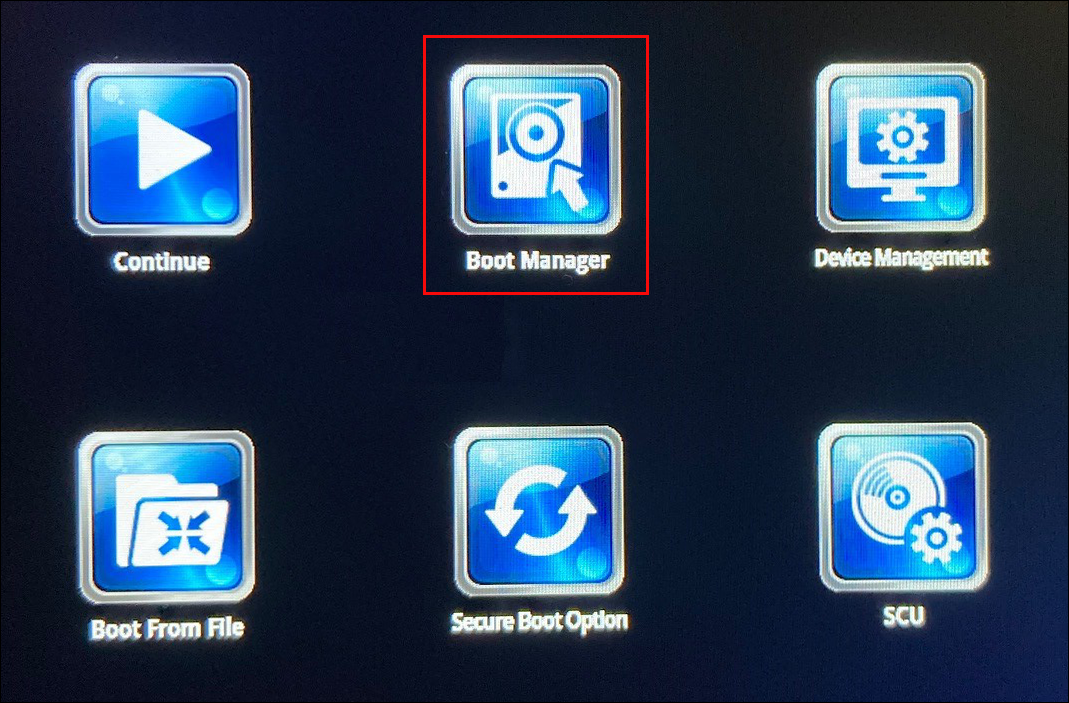
Select EFI USB Device.

Select your preferred language, time, and keyboard preferences. Tap Next.
Select Install Now.
Accept the licensing agreement and tap Next.
Select Custom: Install Windows only.
Delete all the partitions. (Windows will prevent you from deleting one of them.) Tap Next.
Windows will install. Click through all the setup screens.
Note: If you are planning to update the BIOS/UEFI version, do not connect to the internet.
Check BIOS/UEFI Version
Mesa 3
Continue to the next section for Mesa 2 instructions.
In the Windows search bar, type msinfo.
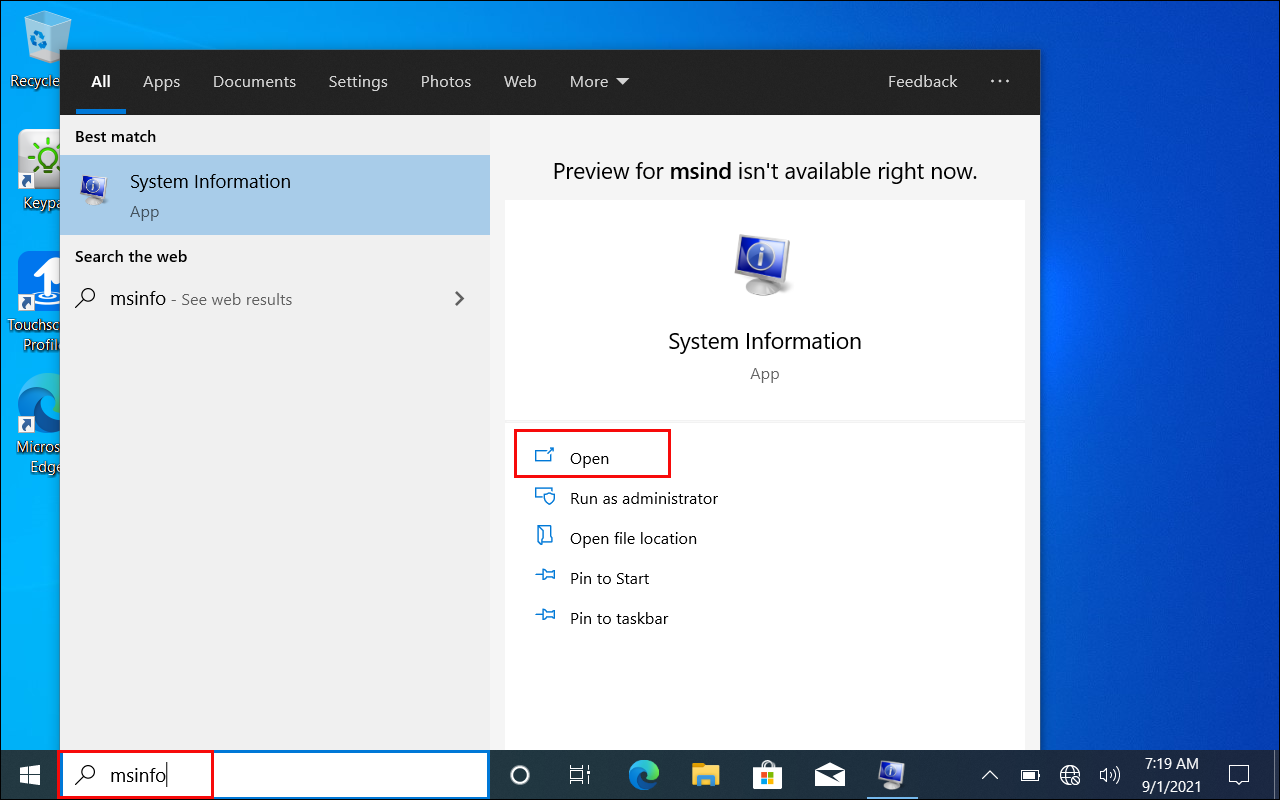
Windows will display the System Information app. Select Open.
Check the BIOS/UEFI version. The last two numbers in the version are the important information.
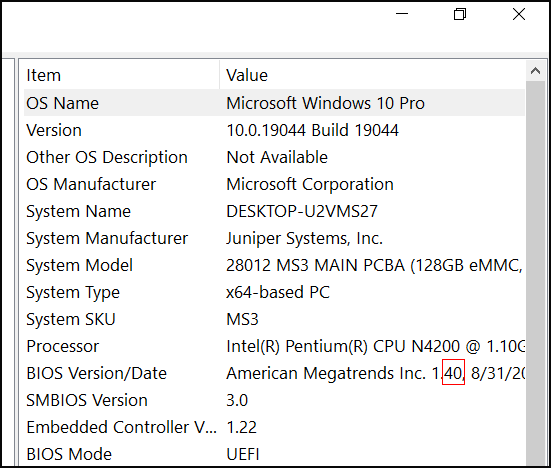
Go to Mesa 3 Windows Firmware Updates. Compare the last two numbers in the BIOS/UEFI version of your Mesa 3 with the last two numbers in the UEFI version listed as the most current.
If the BIOS/UEFI is up-to-date, go to Install the Mesa Drivers Package. If the BIOS/UEFI is not up-to-date, go to the next section.
Mesa 2
In the Windows search bar, type msinfo.
Windows will display the System Information app. Select Open.
Check the BIOS/UEFI version. The last two numbers in the version are the important information.
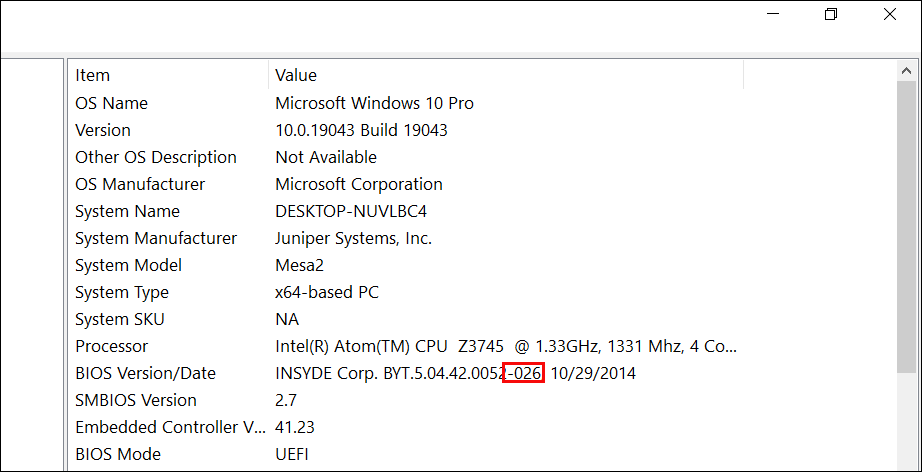
Go to Custom Firmware Updates for Mesa 2 Windows. Compare the last two numbers in the BIOS/UEFI version of your Mesa 2 with the last two numbers in the UEFI version listed as the most current.
If the BIOS/UEFI is up-to-date, go to Install the Mesa Drivers Package. If the BIOS/UEFI is not up-to-date, go to the next section.
Update the UEFI
Mesa 3
Continue to the next section for Mesa 2 instructions.
Verify that the Mesa 3 is plugged into the wall and not connected to the internet.
WARNING: Interruptions during a UEFI update could cause serious damage to the Mesa 3.
On a separate PC, go to Mesa 3 Windows Firmware Updates.
Download the latest UEFI installer to a USB drive.
Plug the USB into the Mesa 3, copy the update.exe to the device.
Remove the USB media and execute the UEFI installer.
Follow the on-screen instructions.
When the update is complete, Reinstall Windows 10 again.
Mesa 2
Verify that the Mesa 2 is plugged into the wall and not connected to the internet.
WARNING: Interruptions during a UEFI update could cause serious damage to the Mesa 2.
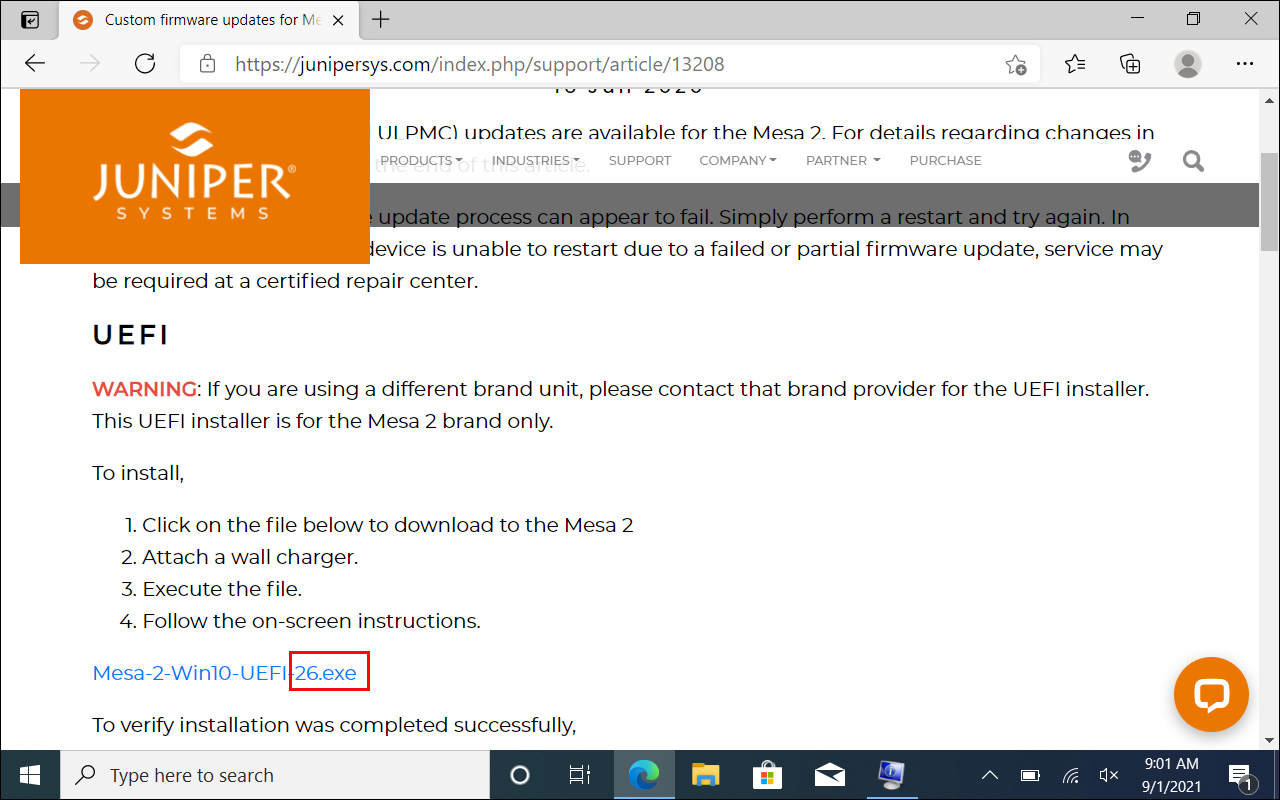
On a separate PC, go to Custom Firmware Updates for Mesa 2 Windows.
Download the latest UEFI installer to a USB drive.
Plug the USB into the Mesa 2 and execute the UEFI installer.
Follow the on-screen instructions.
When the update is complete, Reinstall Windows 10 again.
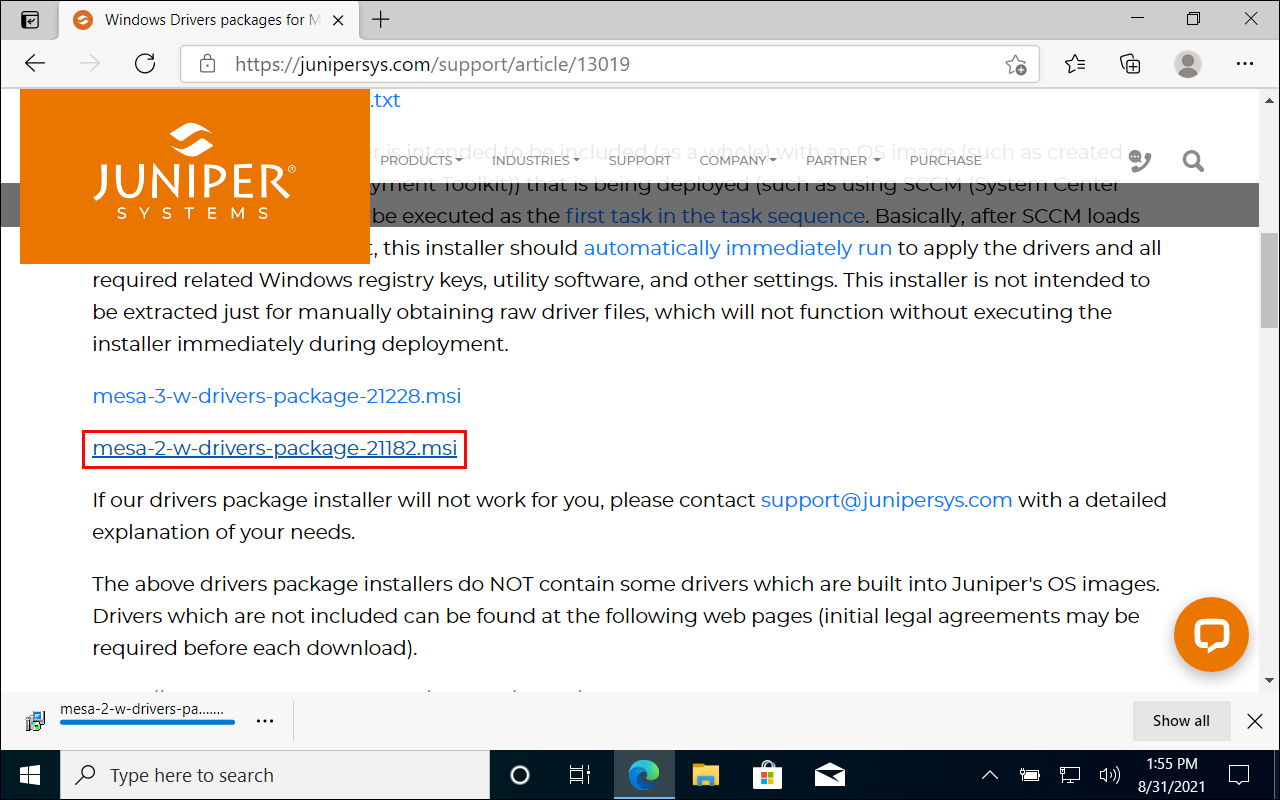
Install the Mesa Drivers Package
Connect your Mesa to the internet.
Using the Mesa, go to Windows Drivers Packages for Mesa 3 and Mesa 2.
Download and run the current Mesa 2 drivers package.
Follow the on-screen instructions.