
Locking down features of the Mesa
This article describes methods to lock down specific features of the Mesa Rugged Tablet.
One way to lock down your tablet is to use a mobile device management (MDM) system. For more information, see Enterprise Security Integration.
Features of the Mesa tablets with Windows can also be locked down manually for user accounts. KIOSK mode and developer frameworks are available to prevent user access to features or to lock users into a certain app. Some preliminary information for KIOSK mode is provided in Set up a single-app kiosk.
Lock Down Individual Features
If you do not want to use a single-app KIOSK mode, individual features can be disabled separately.
Log in using an Administrator account
Tap Start, then search and select Device Manager.
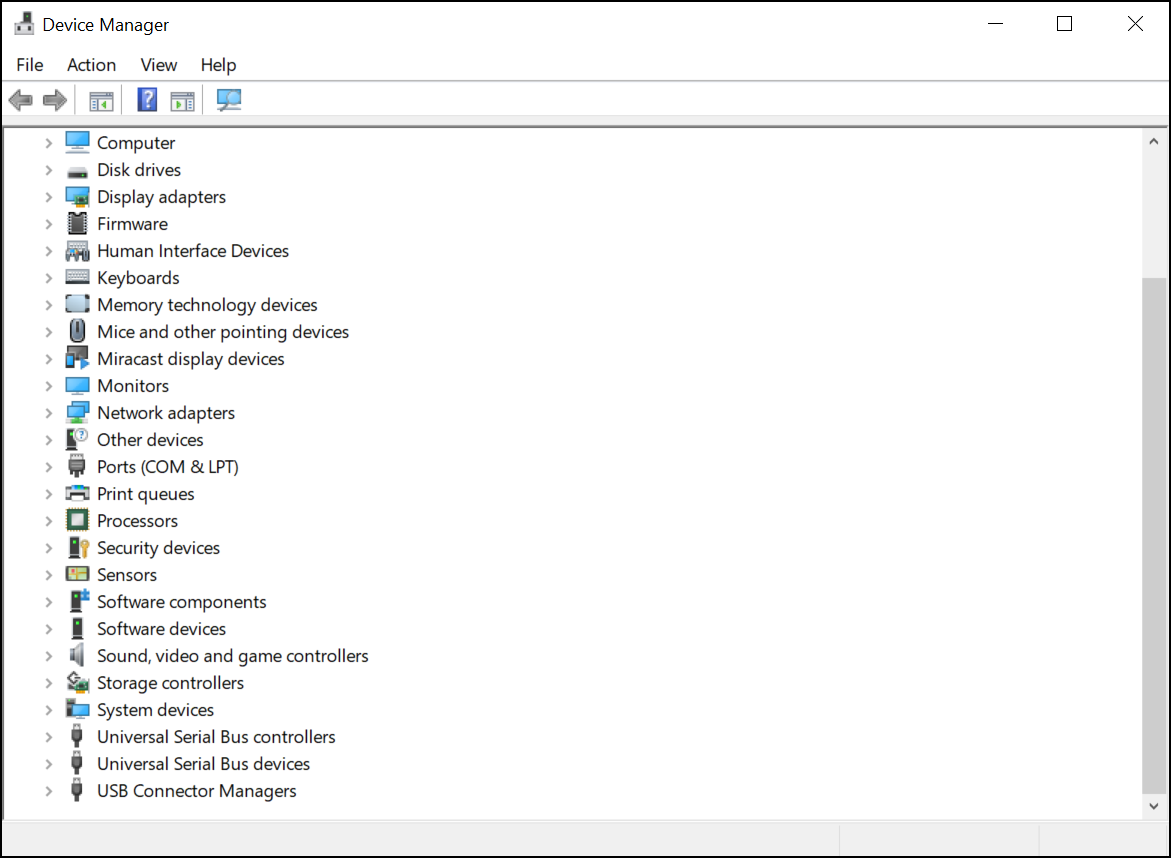
Just as an example, features from the Mesa 2 that can be locked down in Device Manager are listed below.
System devices > Camera Sensor IMX175
System devices > Camera Sensor OV2722
Network adapters > Broadcom 802.11abgn Wireless SDIO Adapter
Broadcom BCM43241 Bluetooth 4.0 + HS module
Audio inputs and outputs > Microphone (Intel SST Audio Device (WDM))
Lock Down Features in Groups
To set group policies to prevent certain features from being enabled or re-installed after an update,
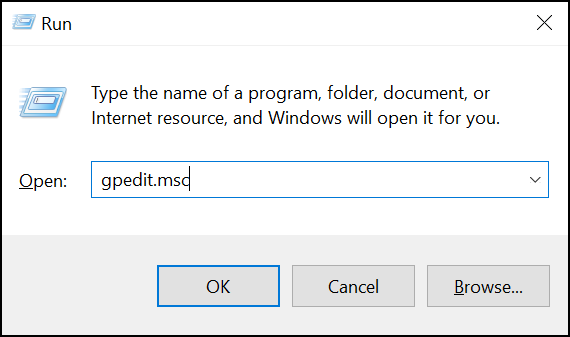
Type Win+R on your keyboard to pull up the Run dialog box.
In the search field type gpedit.msc.
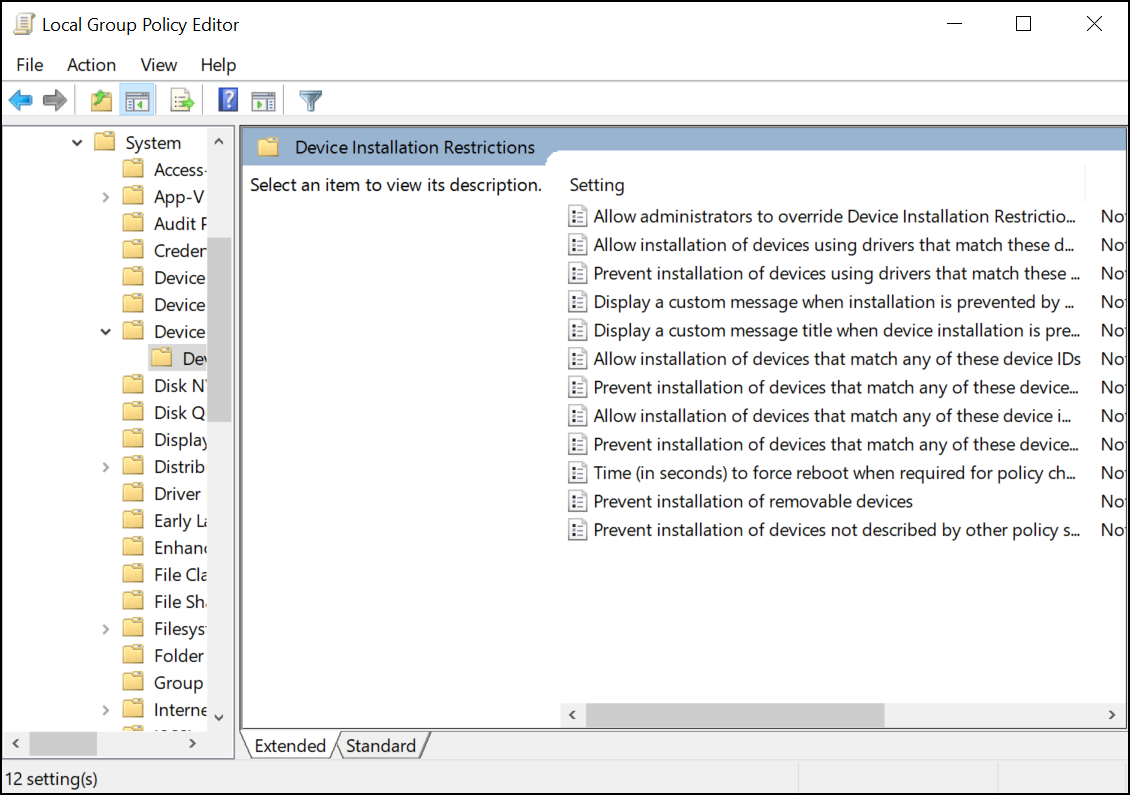
Select Computer Configuration > Administrative Templates > System > Device Installation > Device Installation Restrictions.
Tap Prevent installation of devices that match any of these Device IDs.
Select Enabled.
Tap Show.
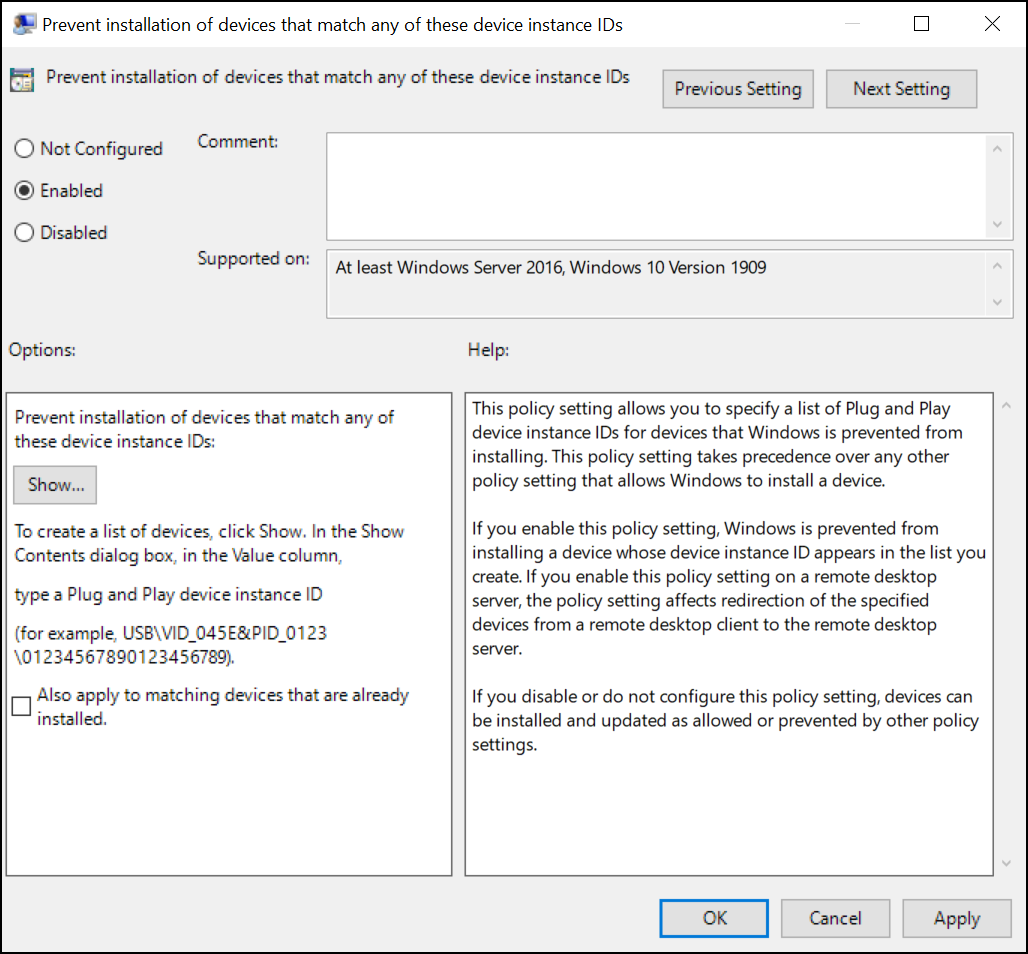
Add the Device IDs for each feature (such as the USB VID and PID numbers).
The above restrictions work for most applications. If you need to have features disabled at a lower level in the firmware, you can contact support@junipersys.com to negotiate costs for creating a custom firmware version for you.
Though it is not recommended, it is possible to electronically disconnect or physically remove the integrated hardware for such features from a Mesa 2 or Mesa 3 unit. Contact repairs@junipersys.com to negotiate custom modifications to existing unit(s), or contact militarysales@junipersys.com to negotiate for custom new units.