
Change the Email Address Assigned to Your Uinta Subscription
If the email address used to subscribe to Uinta is no longer valid, you can transfer your account to a new email address. The steps you follow depend on the number of Uinta licenses your organization purchased.
For instructions, see One Uinta License or Multiple Uinta Licenses.
CAUTION: To avoid data loss, ensure all project data has been synchronized to the cloud before changing the email address.
One Uinta License
If your organization has one Uinta license, follow these steps to change the email address.
Step 1: Create a new Uinta user account.
Open License Manager.
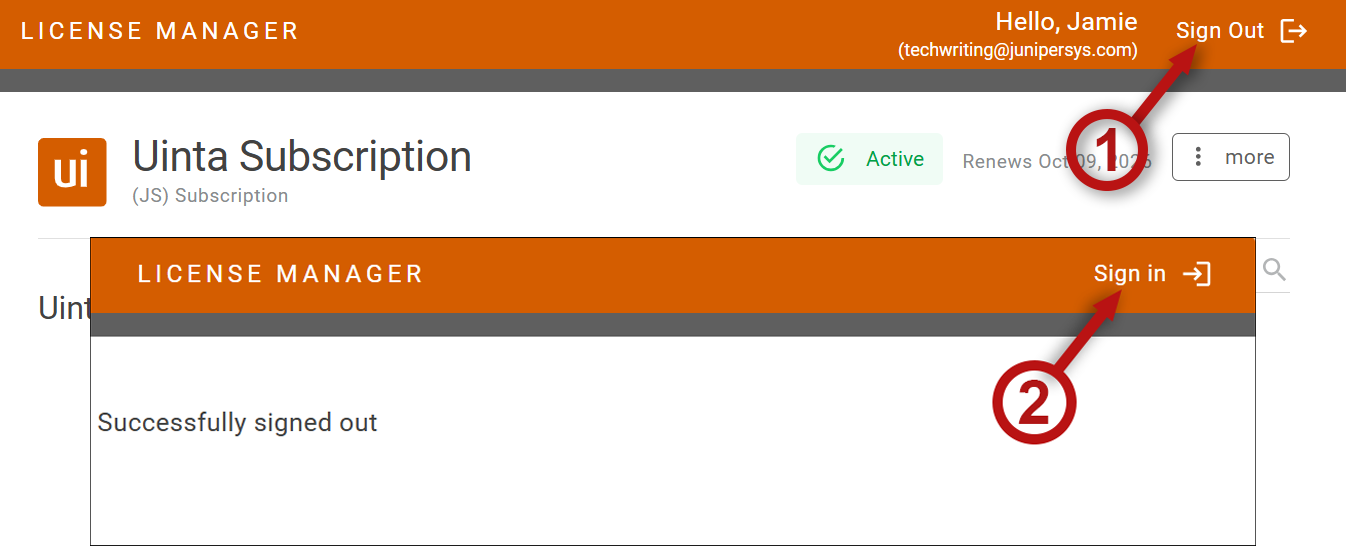
If you are signed in, tap Sign Out. Then, tap Sign In.
In the Sign In dialog, tap Sign up now.
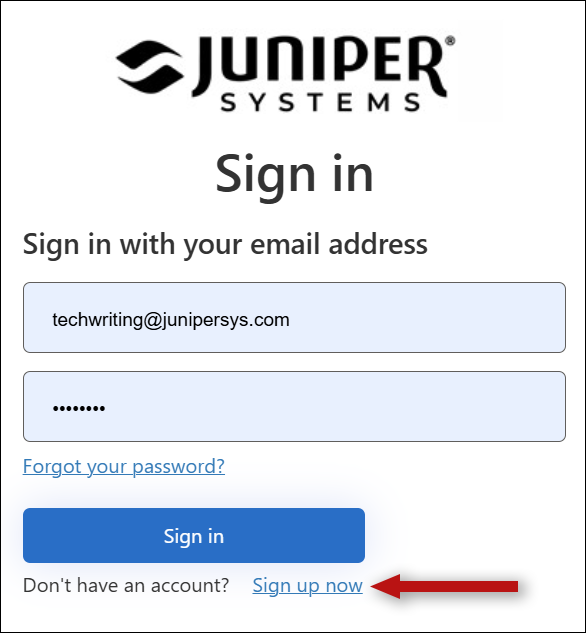
Create an account using the email address you want to associate with your Uinta account.
Tip: We recommend using a generic company email address that is not tied to a specific employee.
Step 2: Update project access.
After you remove the old email address from your Uinta account, any projects associated with that email address will no longer be visible. To prevent this, you must grant the new user account access to all projects that you want to keep.
Open Uinta.
From the Projects screen, verify that all projects are synchronized to the cloud.
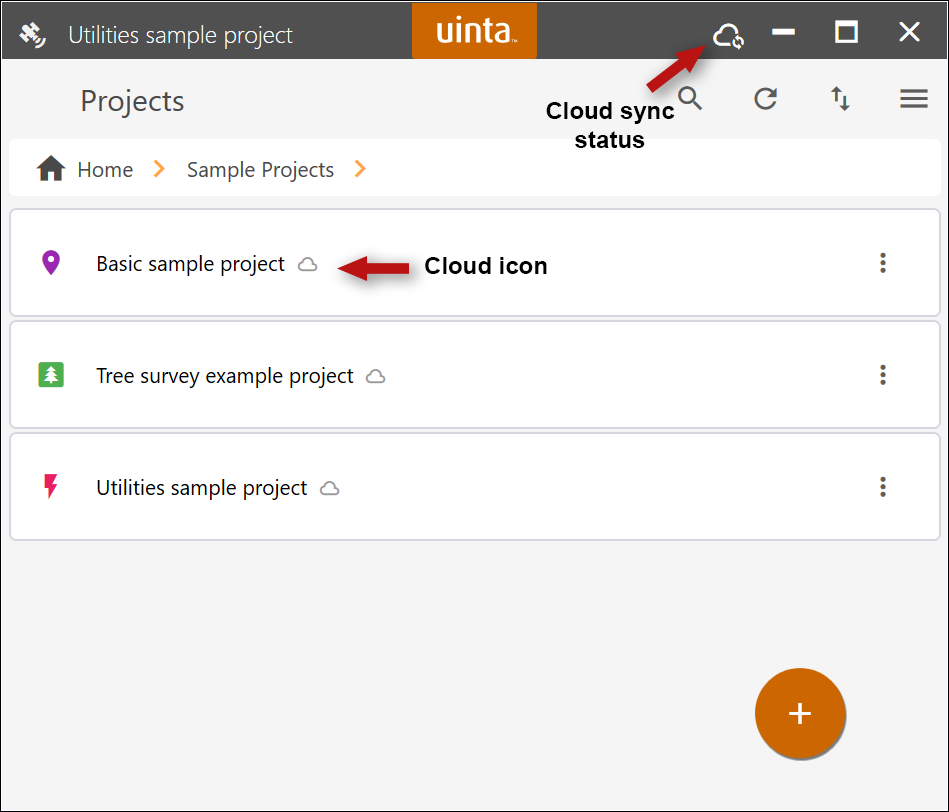
For each project that you want to keep, tap
 and select Manage access.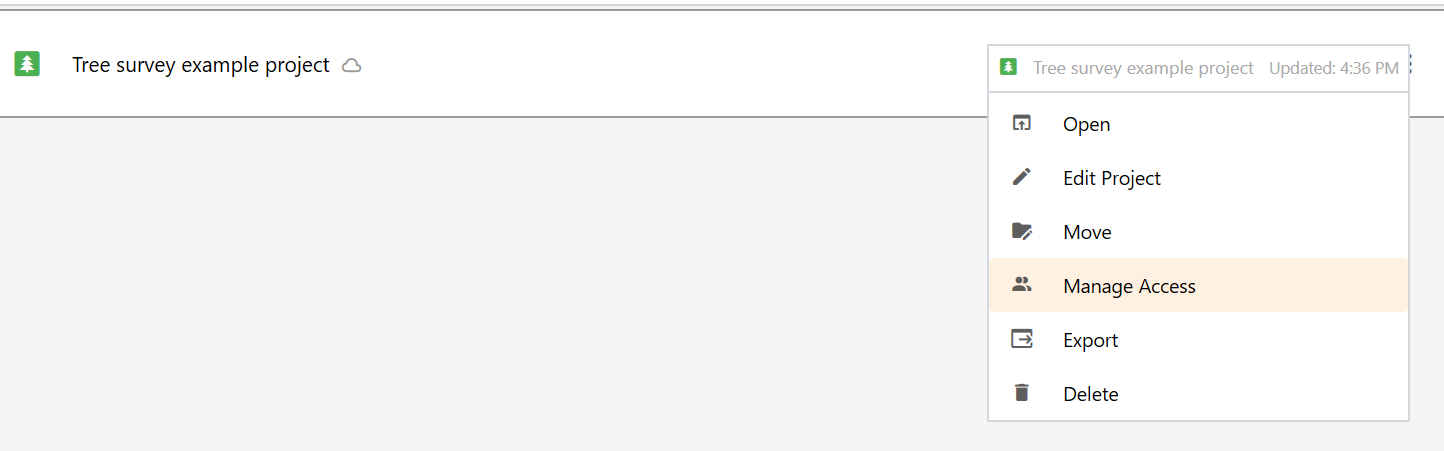
Tap Add users.
Enter the email address for the new user account.
Tap
 .
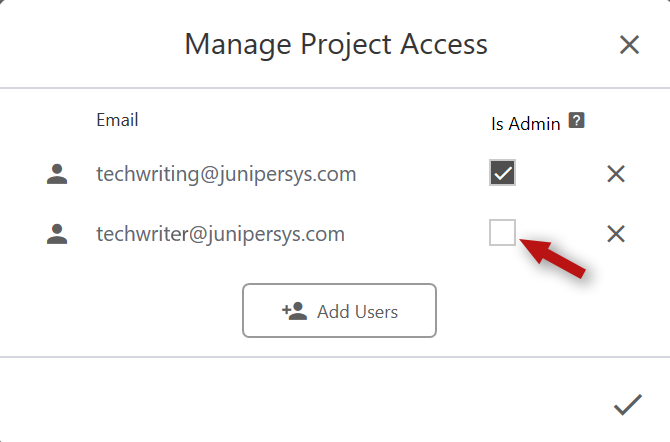
.In the Manage Project Access dialog, select Is Admin checkbox.
Tap
 .
.Tap
next to the project and select Cloud sync to sync the project change to the cloud.Repeat these steps for each project that you want to keep.
Step 3: Revoke user access.
Open License Manager.
Sign in with the old user account (or the email address you are removing).
Next to the user account, tap Revoke.
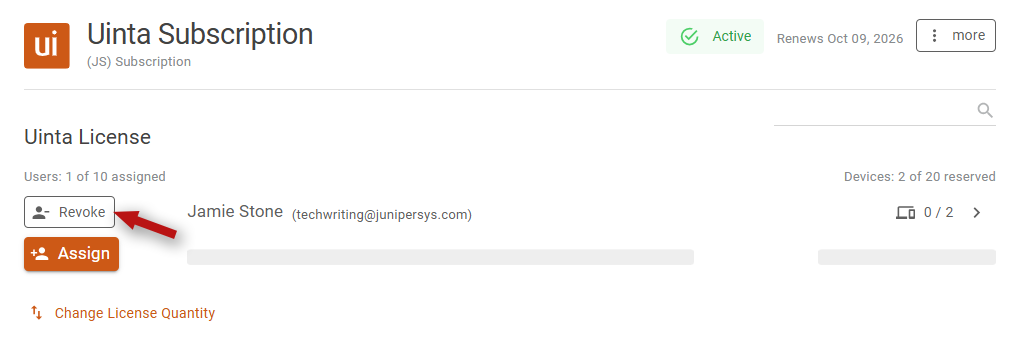
To confirm, tap Yes, Revoke License.
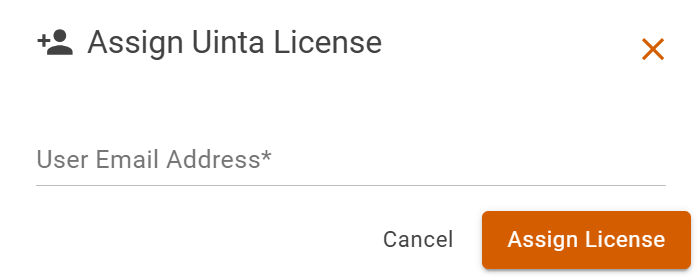
Tap Assign.
In the Assign Uinta License dialog, enter the email address for the new user account. Then, tap Assign License.
Tap Admin in the side bar.
Tap Add Admin.
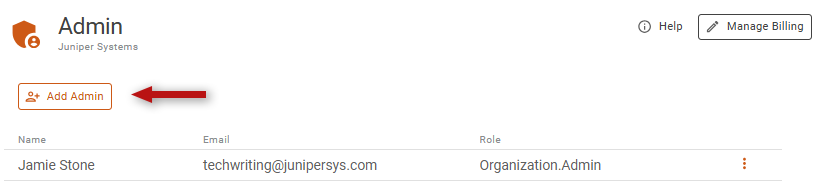
Enter the email address for the new user account.
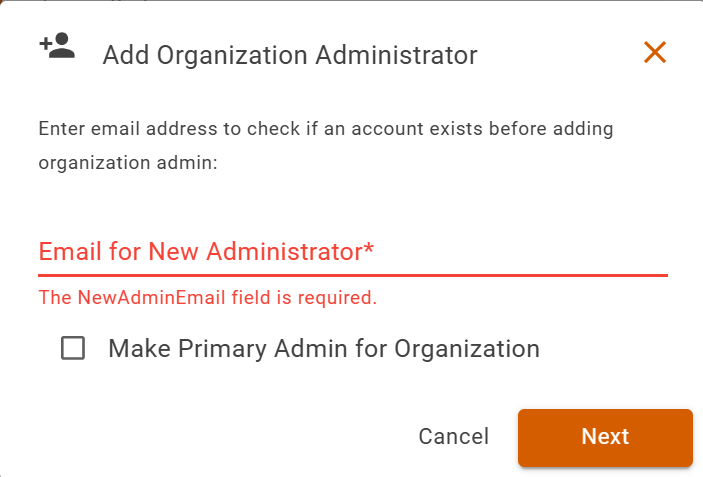
Select Make Primary Admin for Organization.
Tap Next.
Tap Add User as Admin to confirm the change.
Multiple Uinta Licenses
If your Uinta subscription includes multiple licenses and you need to revoke access for a user account, follow these steps.
Step 1: Create a new Uinta user account.
Open License Manager.
If you are signed in, tap Sign Out. Then, tap Sign In.
In the Sign In dialog, tap Sign up now.
Create an account.
Step 2: Reassign the license.
Open License Manager.
Revoke the user account associated with the old email address.
Tap Revoke next to the account.
To confirm, tap Yes, Revoke License.
Assign the license and associated devices to the new user account.
Tap Assign.
In the Assign Uinta License dialog, enter the email address for the new user account. Then, tap Assign License.
To give the new user account administrative privileges, tap Admin in the sidebar.
Tap Add Admin.
Enter the email address for the new user account.
Select Make Primary Admin for Organization.
Tap Next.
Tap Add User as Admin to confirm the change.
Step 3: Update project access.
Share any projects associated with the revoked account with another user account.
Open Uinta.
From the Projects screen, verify that all projects are synchronized to the cloud.
For each project associated with the revoked user account, tap
and select Manage access.Tap Add users.
Enter the email address of the user account that should have access to the project.
Tap
.Tap
.Tap
next to the project and select Cloud sync to synchronize the change with the cloud.Repeat these steps for each project associated with the revoked user account.