Customize Forms in Uinta
Uinta allows you to create custom project templates to match your data entry and office reporting needs. You can edit or add fields in your records, add tabs to categorize data entry, create conditional logic, or group record types to guide data entry workflows.
Customizations can be completed in two areas:
- Template Designer: In the Projects screen, you can access the Template Designer from the Menu. The Template Designer allows users to create custom project templates that will be available when starting new projects.
Note: Changes made to a Template will only apply to future projects that are created based on the Template.
-
Project Editor: You can further customize an active project by selecting the orange plus button, then choosing the Edit Pencil or by accessing the Project Editor.
-
Customizing from the Edit Pencil is a great way to ensure that the data entry workflow aligns with the logical steps in the field. Once changes are made, you can "Save as Template" and future projects can be created based on the saved template.
-
Customizing from the Project Editor screen is similar to the Template Design view, but the changes made will only apply to the active project. Once changes are made, you can "Save as Template" and future projects can be created based on the saved template.
-
Add or Edit Fields
Add Fields
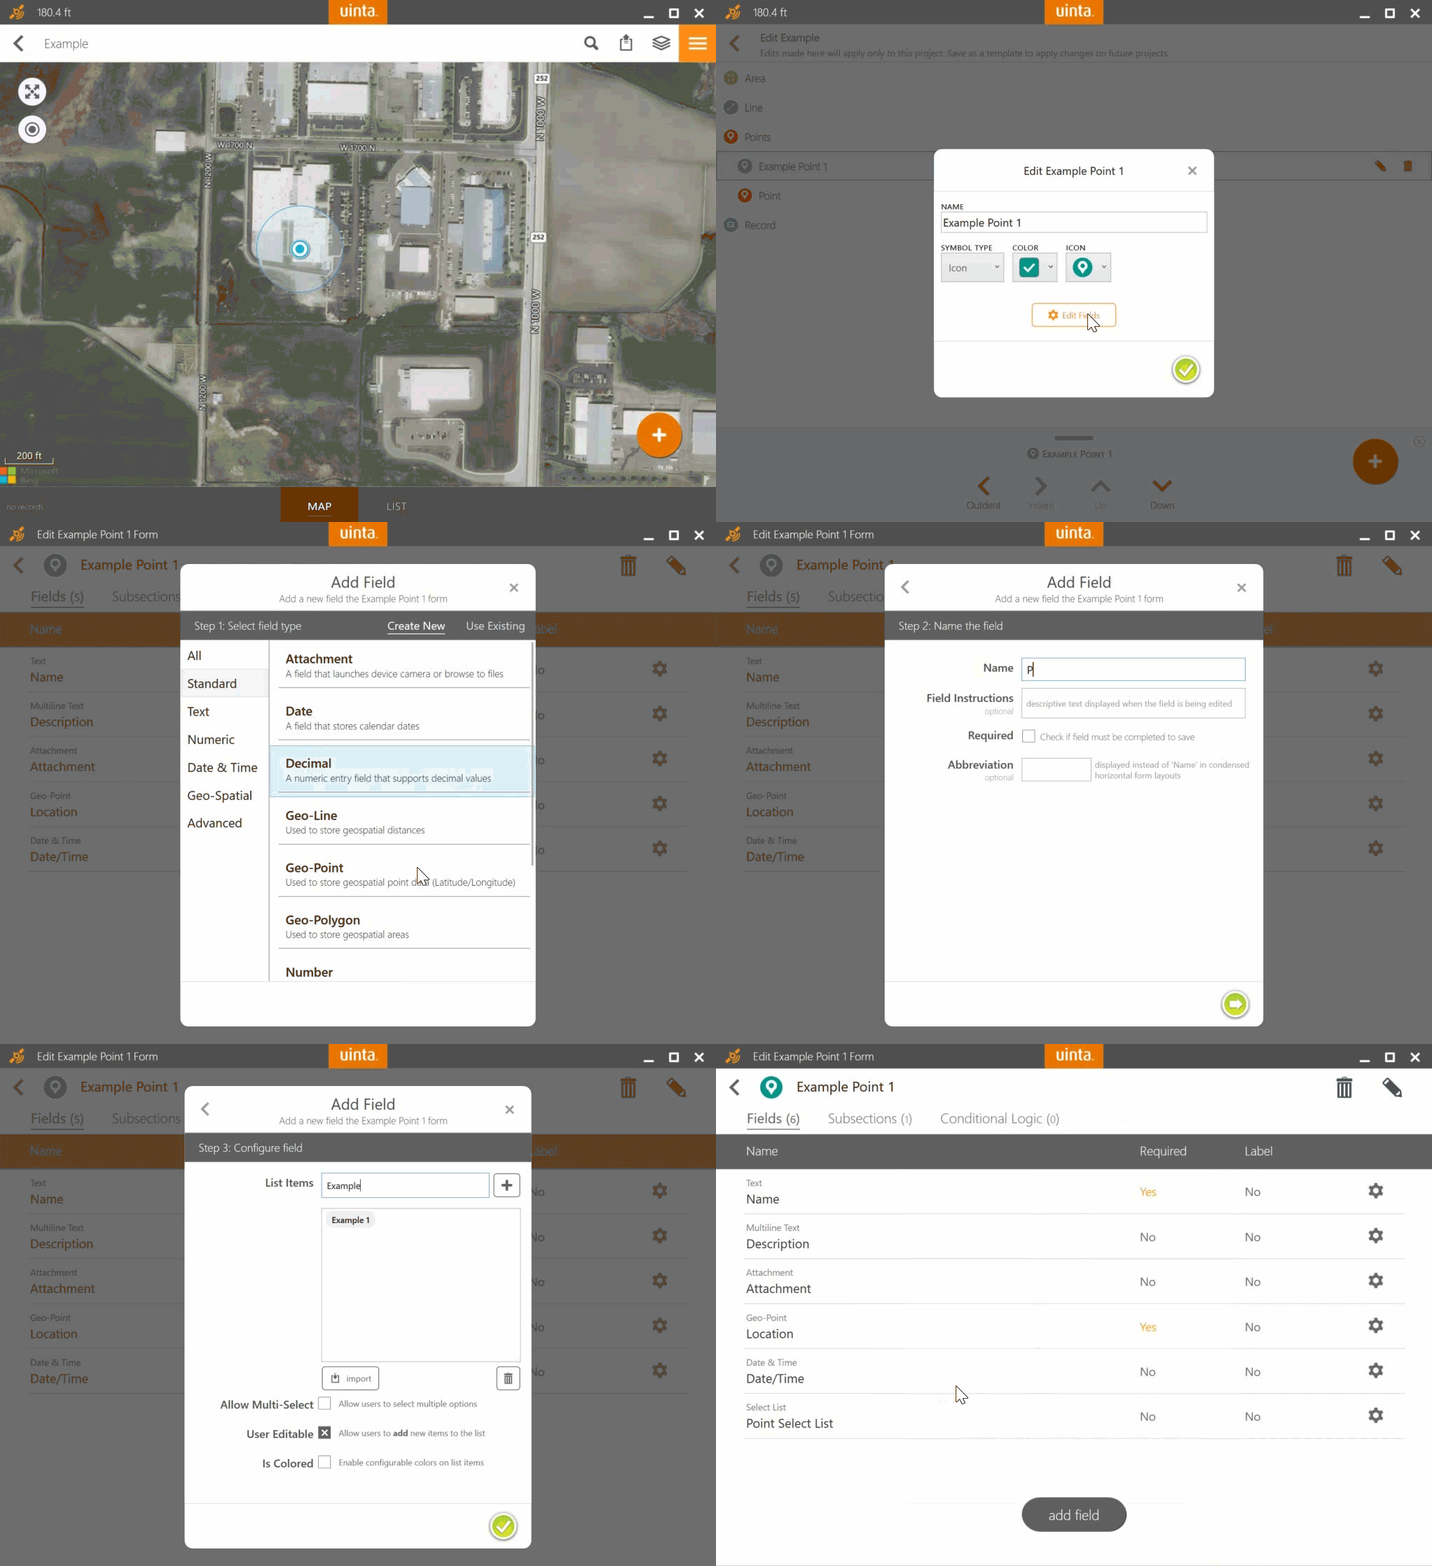 |
|
| Field | Description |
| Attachment |
A field that launches the device camera or browses files |
| Bool (Yes/No) |
A field that allows the selection of two customizable options |
| Checkboxes |
Check multiple values from a configurable list of options |
| Date |
A field that stores calendar dates |
| Date & Time |
A field that allows the selection of a date and time |
| Decimal |
A numeric entry that supports decimal values |
| Decimal List |
A numeric entry that allows multiple decimal values |
| Geo-Line |
Used to store geospatial distances |
| Geo-Point |
Used to store geospatial point date (Latitude/Longitude) |
| Geo-Polygon |
Used to store geospatial areas |
| Multiline Text |
A multiline text field that allows input of longer text strings |
| Number |
A field that only allows entry of numeric integer values |
| Numeric List |
A numeric entry that allows multiple integer values |
| Numeric Text |
A text field that limits input through a customizable numeric keypad |
| Pick List |
A single select list with a configurable list of options |
| Select List |
A searchable single or multi-select list |
| Sequence Number |
An automatically assigned numeric sequence number |
| Text |
A free form, single line, text input field |
| Text List |
A text input field that allows multiple entries |
Organize or Edit Fields
|
|
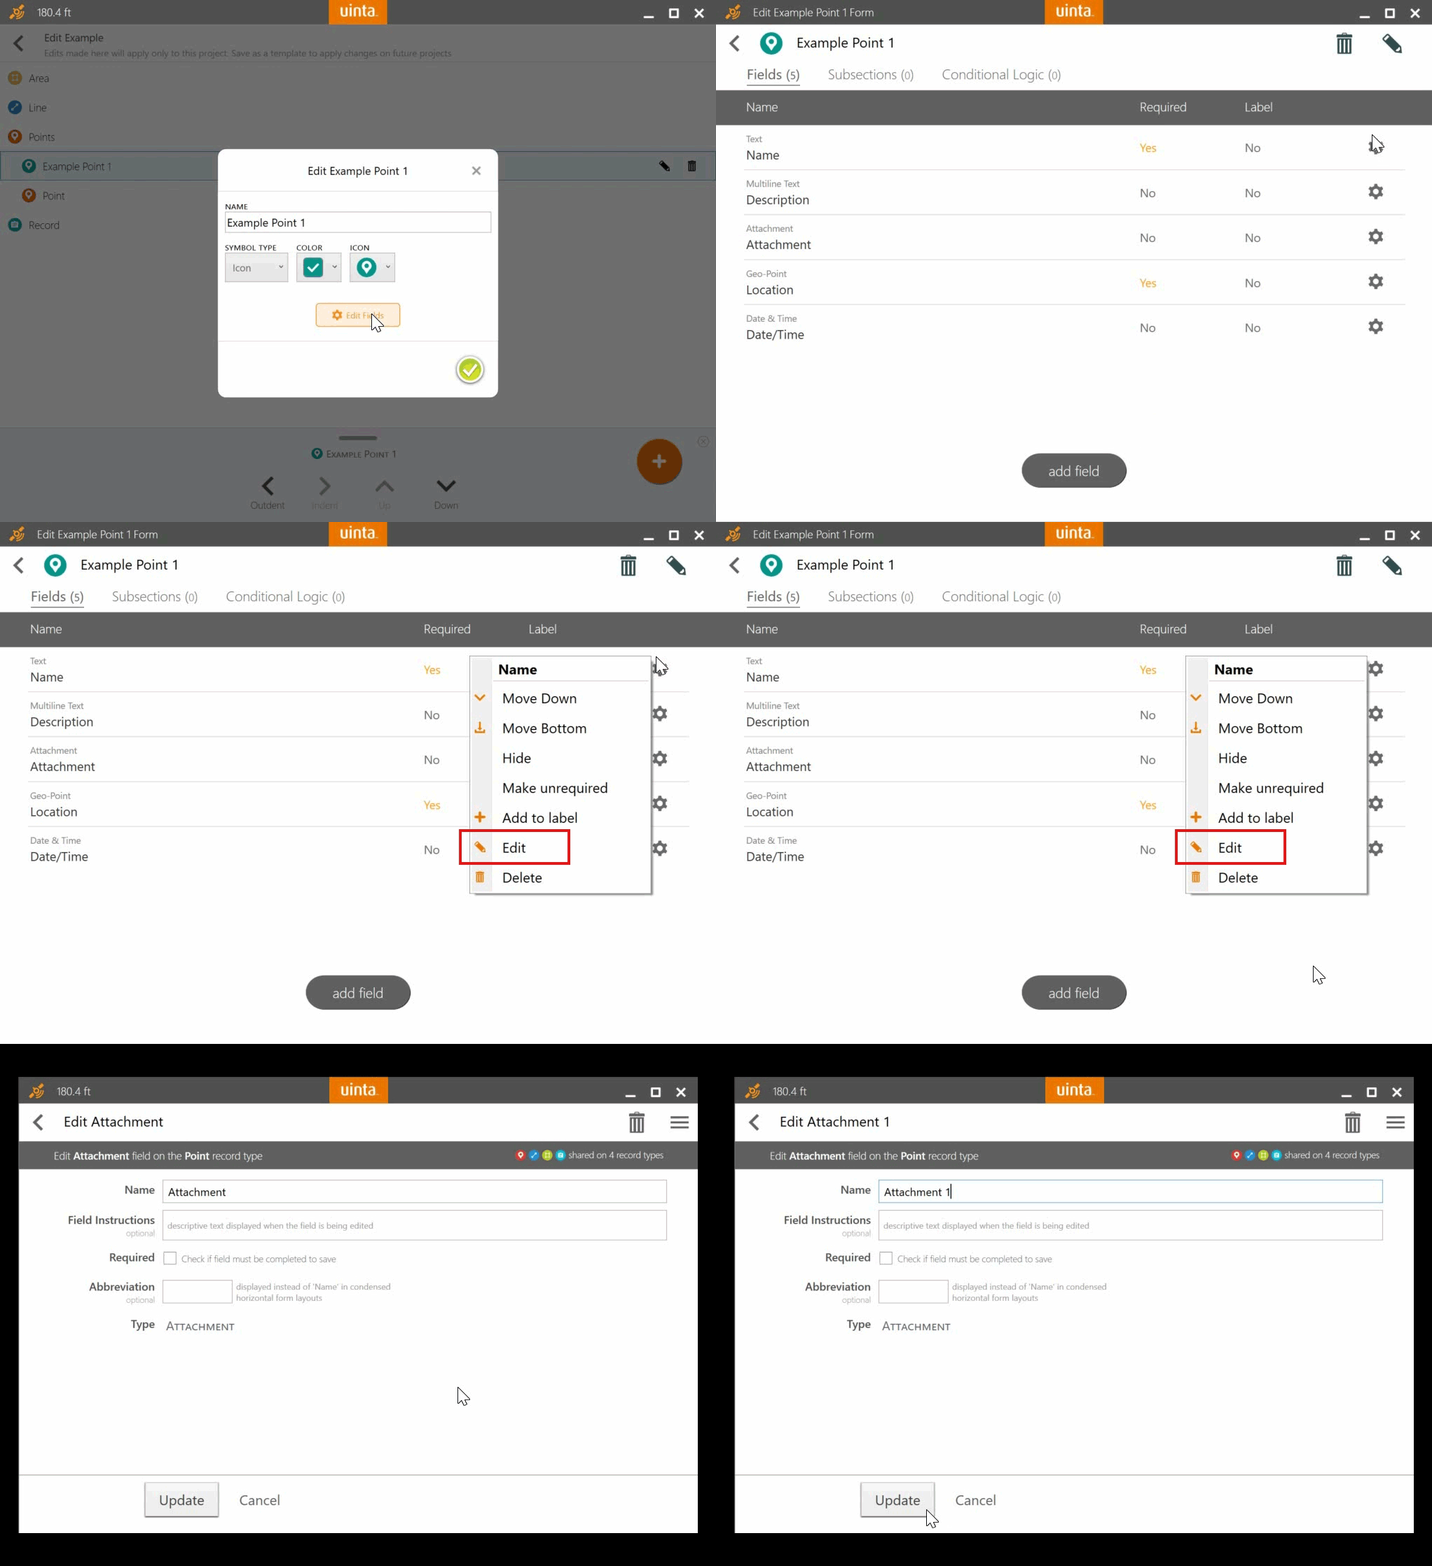
Note: In Windows, you can also move the fields by dragging and dropping them. If you select Edit, you can change the name of the field, add field instructions, determine if the field is required, or add an abbreviated name.
|
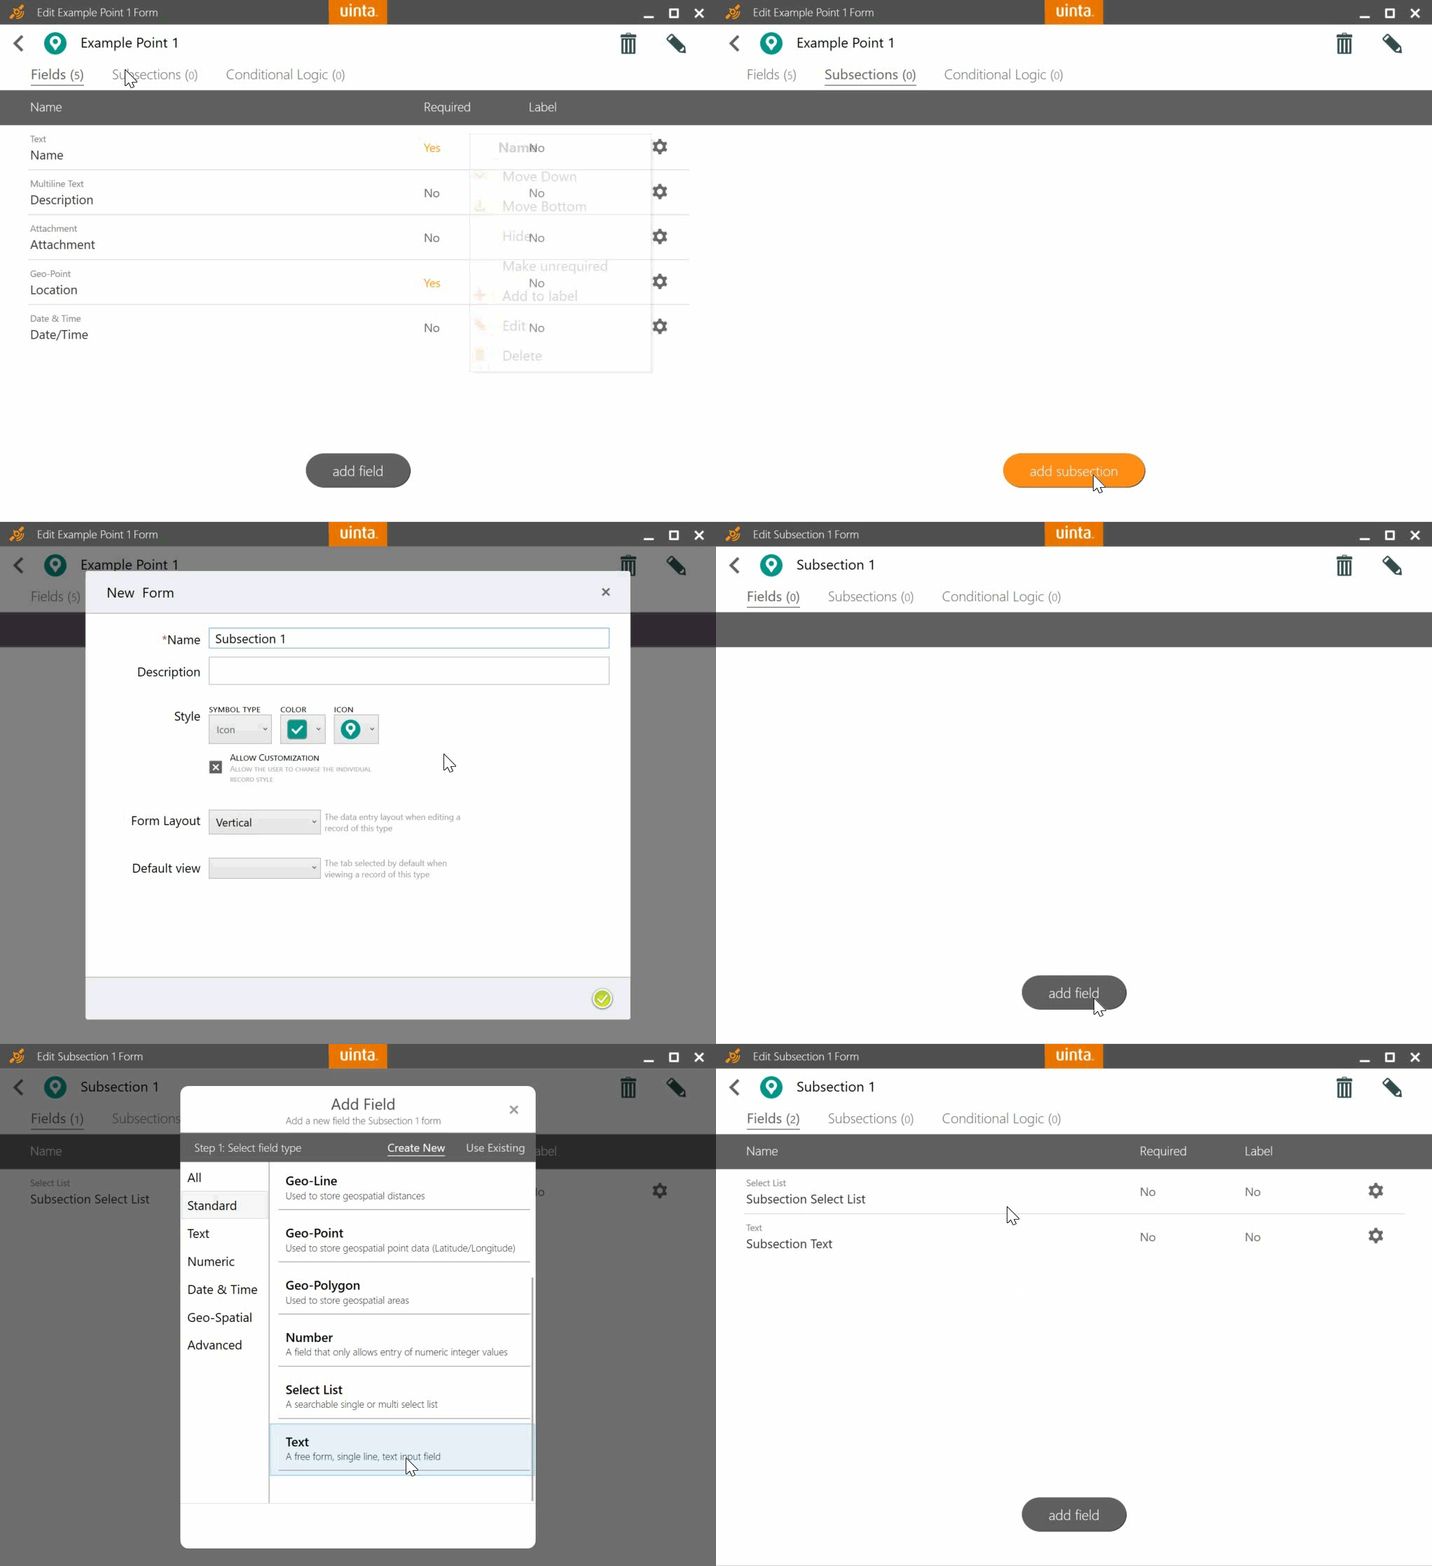
Add or Edit Tabs
Add Tab
|
|
|
Edit Tabs
-
In the Project Editor, select the tab you would like to edit.
-
In the right-hand corner of the Tab form, select the pencil icon.
You can also edit the tab by clicking the gear icon next to the tab you would like to edit.
Set Up Conditional Logic
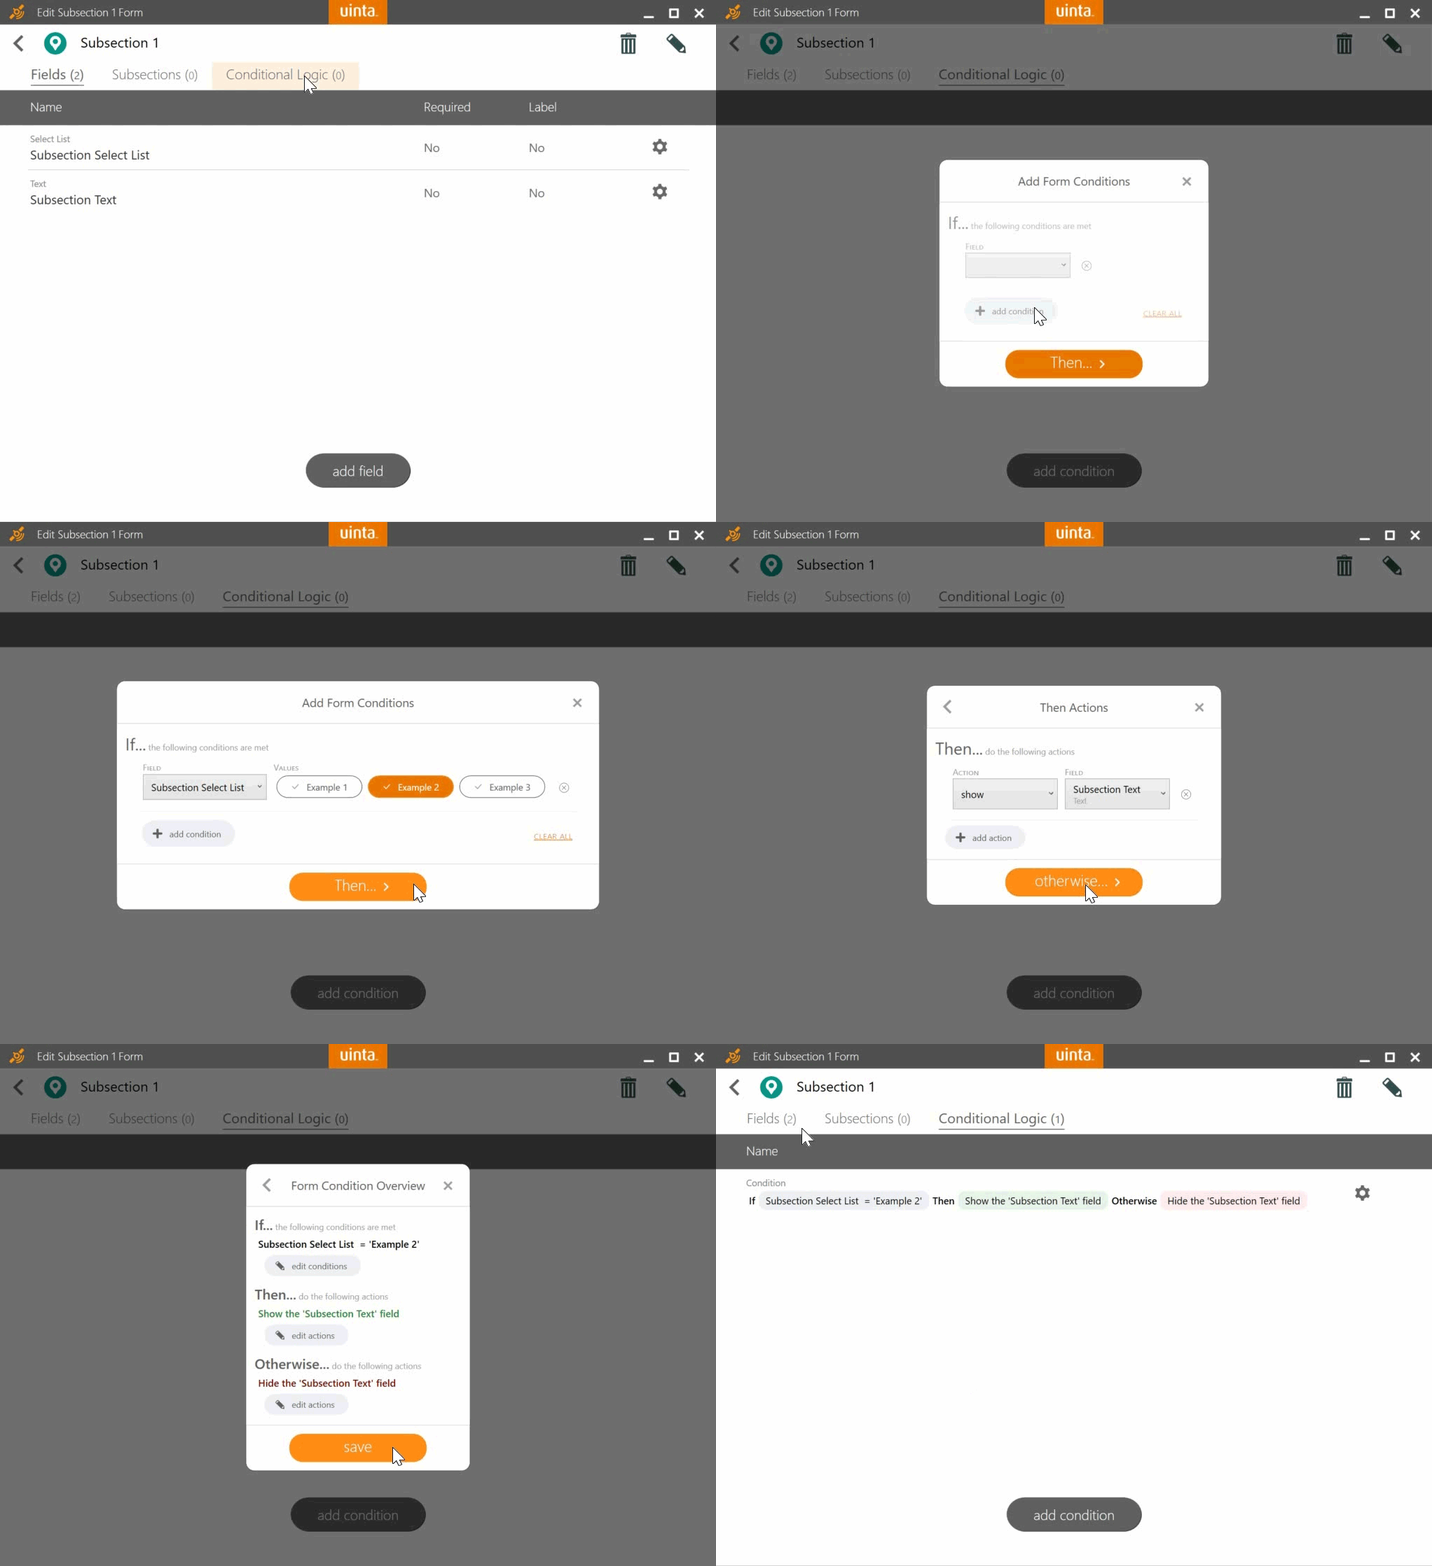
Conditional logic cannot be created in Android. However, if you create conditional logic for your project in Windows, the logic will still work if you use the project in Android.
|
|
In the Form Condition Overview dialog box, you can edit any of the fields in the conditional logic. |
Group Records
You can group records in three ways:
Option 1:
|
|
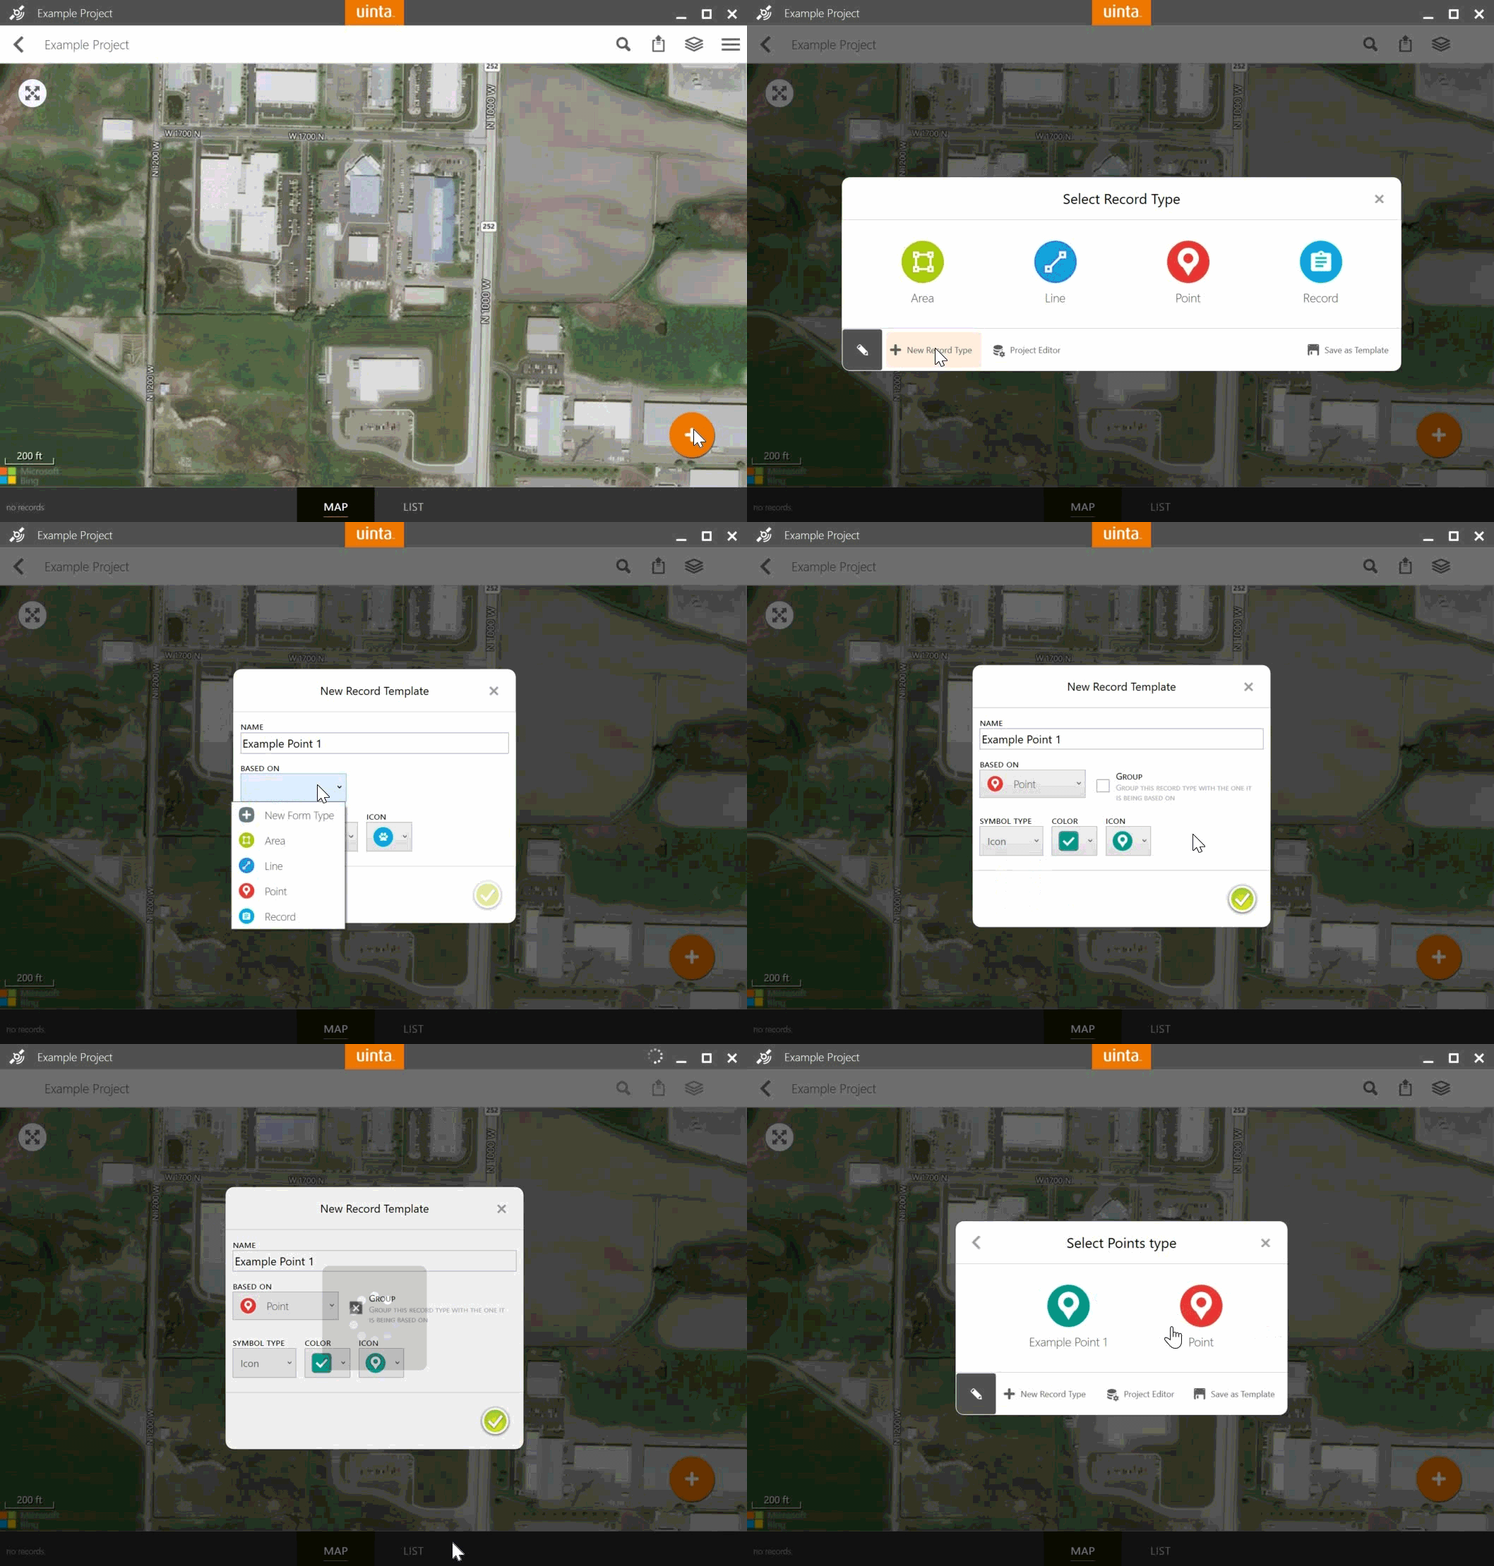
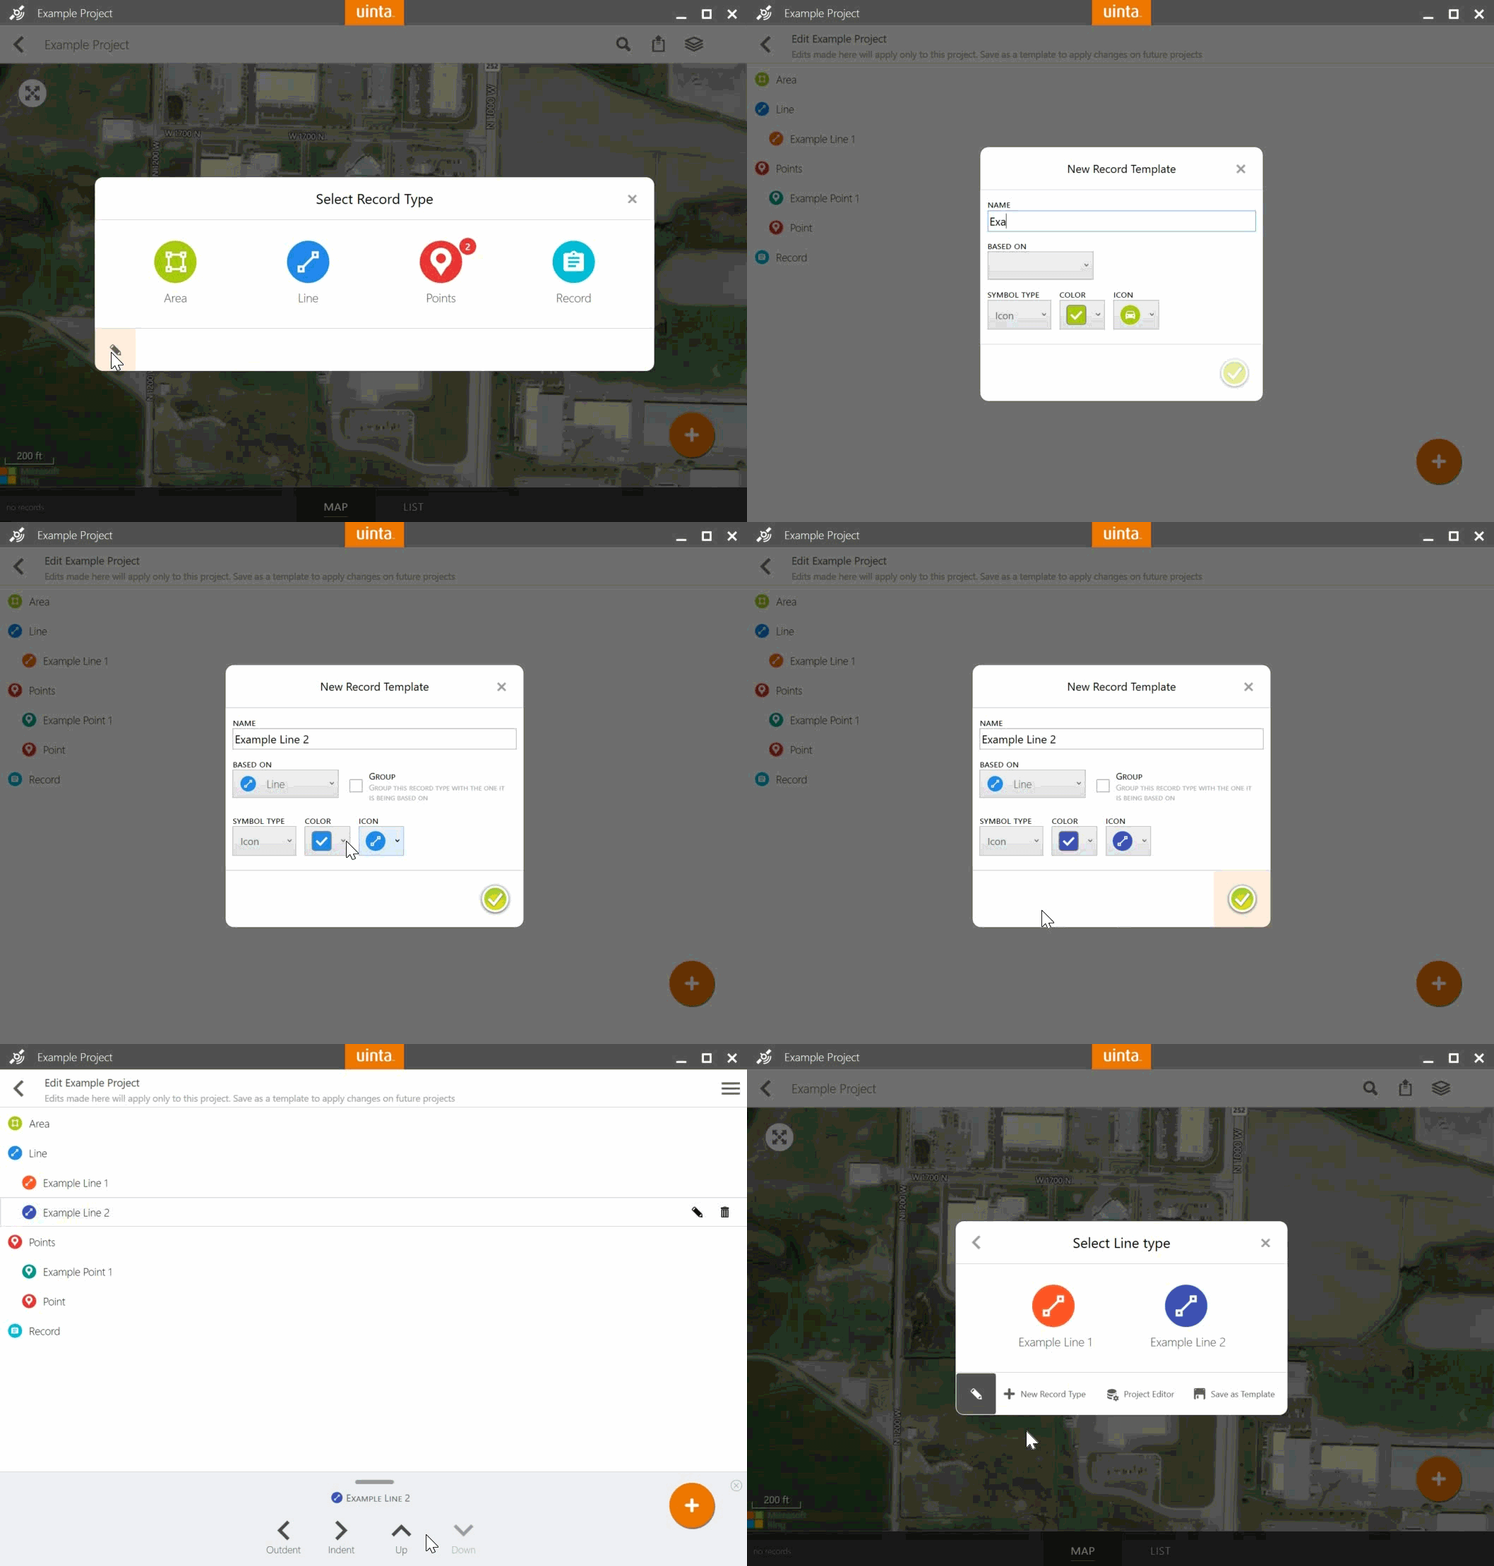
This will group the record with the record it is based on. For example, if you base the record template on a point, it will be grouped under Point when you click on the orange plus button.
|
Option 2:
|
|
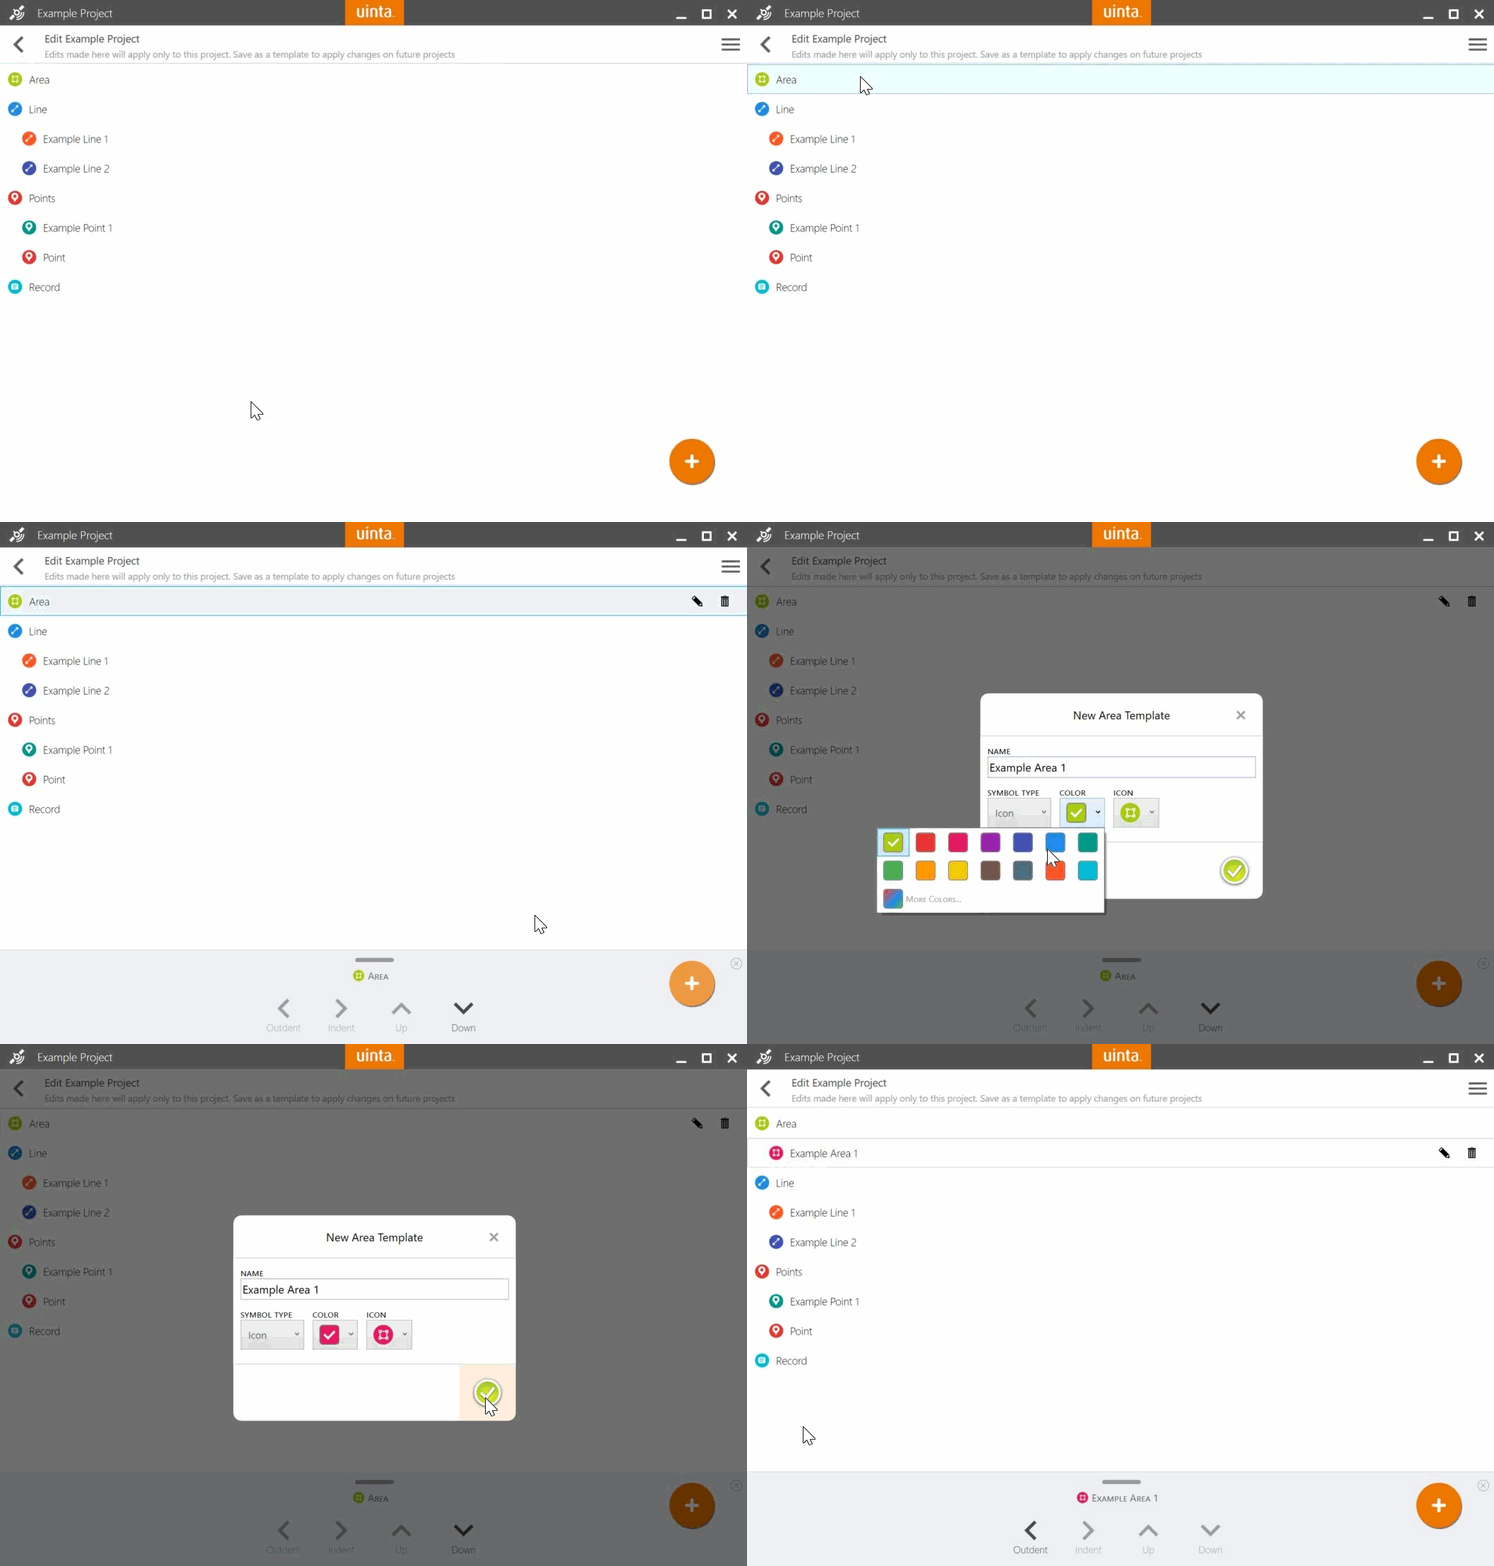
You can move the record templates around by using the ungroup, group, up, and down options on the bottom of the screen. Group the record templates by indenting and outdenting. |
Option 3:
|
|
This will group the record with the record it is based on. For example, if you base the record on a point, it will be grouped under Point when you click on the orange plus button. If you don't check the Group check box, you can move the record templates around by using the outdent, indent, up, and down option on the bottom of the screen. Group the record templates by indenting and outdenting.
|
Related Information
Return to the Table of Contents.

