Touchscreen Troubleshooting on Mesa 3 Windows
The list below includes some troubleshooting options for the Mesa 3 Windows touchscreen. We also offer Best Practices for Capacitive Touchscreen.
-
Make sure the screen is clean from all debris or other substances (including water).
-
Let the screen auto-rotate from portrait to landscape then back again.
-
Turn the Mesa 3 off and on to force the touchscreen to recalibrate.
-
If you are using a second external monitor, correct the display resolution and/or set the internal display to Main.
-
When moving the unit between environmental conditions, you may need to force the capacitive touchscreen to re-calibrate for use in the new conditions.
-
Attach a USB mouse to open our Touchscreen Profiles utility to select another profile to load and then switch back.
-
Perform a 20-second shutdown.
-
Shut down the Mesa 3.
-
Disconnect the tablet from all external power, including the AC wall charger or a dock.
-
Wait for the red LED to turn off.
-
Press the Power button for 20 seconds.
-
Release the Power button, and wait 30 more seconds for the electronic processes in the background to finish.
-
Plug in the tablet with the AC wall charger.
-
Press the Power button to power on the tablet.
-
Disable and Enable the HID-compliant touchscreen.
-
Use a connected USB mouse to right-click on the bottom-left Start menu.
-
Select Device Manager > Human Interface Devices.
-
Right-click HID-compliant touchscreen.
-
Select Disable.
-
Wait several seconds, then repeat steps 1-4 to Enable.
-
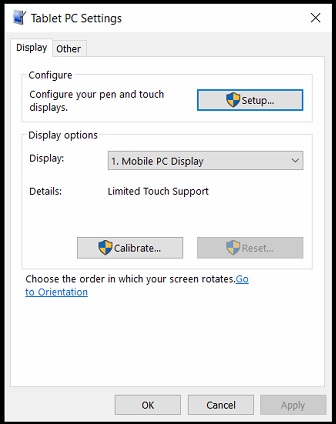
- If the Microsoft Windows 10 calibration tool is used, it may degrade the touchscreen performance until a profile is loaded again. If loading or switching a touch profile does not fully resolve the issue,
-
Open the Tablet PC Settings control panel.
-
Select Reset.

- If the touchscreen stopped working after a Windows Update,
-
Go to Start > Settings > Update & Security > Recovery.
-
Select the option to “Go back to the previous version of Windows 10” or “Go back to an earlier build.”
This option is only available for a limited time after updating. Do the Windows Update again, which should have more success in subsequent attempts.
