Collect Data with Uinta
Uinta uses four types of records for capturing project data. In your project, the name, symbol, and color assigned to each type of record was set up during the project creation.
| Basic Record Types | |
| Type | Description |
| Area | A geo-area with a defined boundary, such as a water feature or field. Must include at least three points. |
| Line | A geo-line with a beginning and an ending point, such as an electrical line or water line. |
| Point | A geo-point with a stable location, such as a water meter, tree, or utility pole. |
| Record | Informational record used for custom forms that have no geospatial mapping requirement. |
Add a Point to a Map
You can add a point to the map while in the field or remotely from the office. If you have a GPS connection, Uinta accurately places a point on the map at the location in which you are standing. If you are at a remote location or don't have a GPS connection, you can manually place a point on the map.
Learn how to add a point to a map:
To add a point to a map,
- Open the project in Map View.
- If using GPS, verify the GPS connection. Then, zoom to your position by tapping the center the GPS icon
 on the left side of the screen.
 - Tap
 .
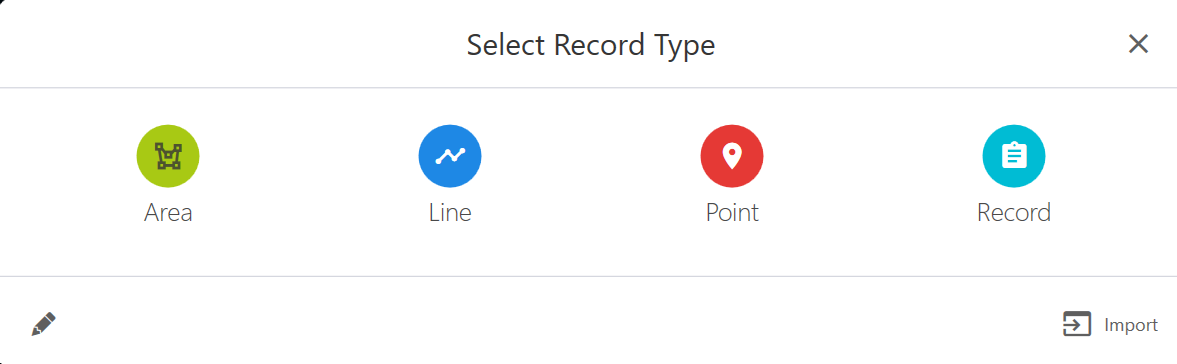
. - From the Select Record Type dialog box, tap the point record type.
The name of the point record type depends on how your project was set up.
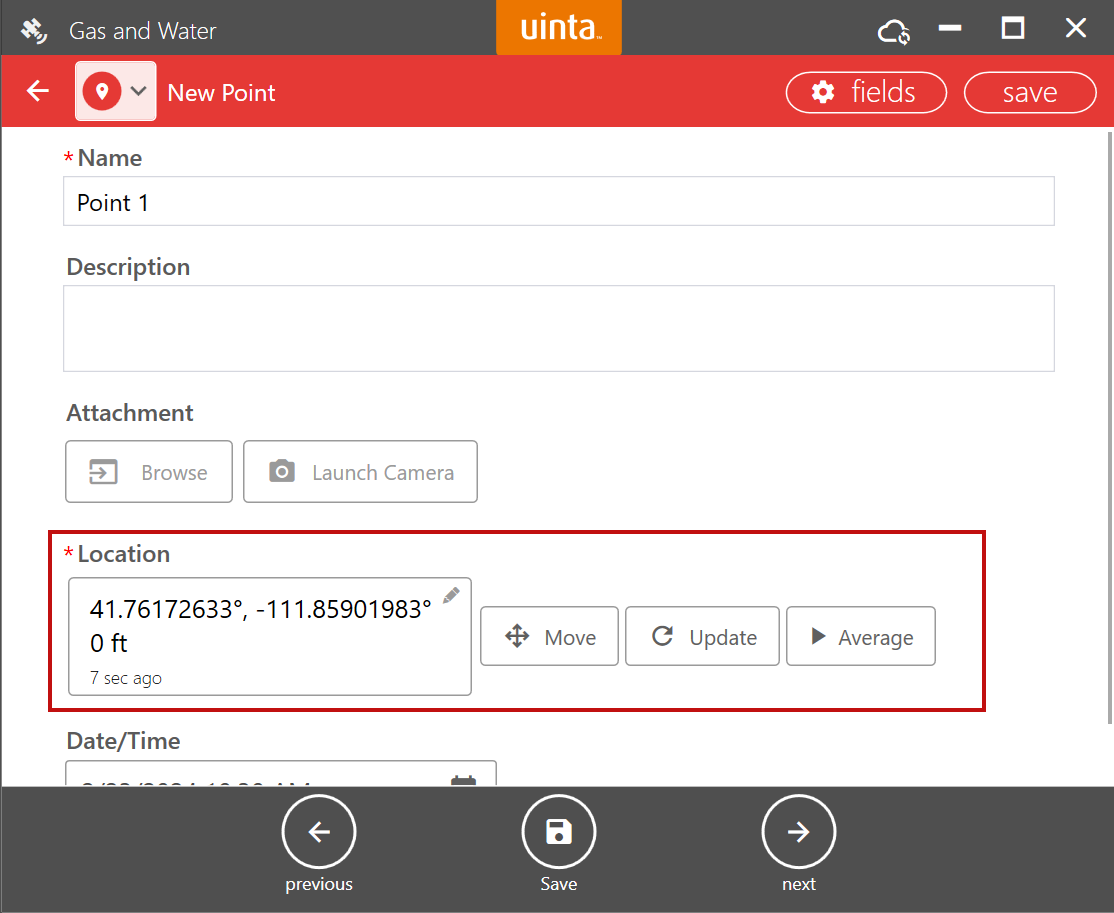
Uinta automatically captures the latitude and longitude for your location and the date/time.
- Use one of the following methods to add the point.
| Add a Point | |||
| To | Work Location | Requires GPS? | Steps |
| Add a point with GPS accuracy | Field | Yes |
|
| Add a point using a mouse | Office | No |
|
| Add a point by dragging the target | Field or Office | No |
|
| Add a point using latitude and longitude coordinates | Field or Office | No |
|
- Enter information about the point.

If needed, you can adjust the geographic location.
- Tap Save.
Adjust the Geographic Location
Adjust the geographic location of a point while adding the point record using the Move, Update, and Average buttons or by entering new latitude and longitude coordinates.
| Adjust the Location | |
| Tap | Description |
| Latitude and longitude coordinates | Enter new latitude and longitude coordinates, and tap |
| Move |
Capture a new location either manually or using GPS. To manually move the point, use the target or mouse to select the desired location. Tap Finish in the menu at the bottom of the screen. To use GPS to get an updated location, select one of the following from the menu at the bottom of the screen:
|
| Update | Uinta captures a new location from the GPS device and updates location and date/time. |
| Average GPS | Uinta starts capturing GPS data points. After the desired time, tap the button again to end the location captures. Uinta averages the GPS data points to possibly get a more precise location (depending on your GPS receiver and environment). |
Add a Line to a Map
There are two methods for adding a line to map and the best method depends on your preferences and line scenario:
- Manual—Allows the user to determine when to add points to the line. This method is recommended for mapping lines that are straight. For example, if you are mapping a straight pipe, you can add a point at the beginning of the line. Then, add an additional point at the end of the line or where the line turns another direction.
- Auto—Uinta automatically marks the GPS location at a designated time or distance interval. This method works well if the line curves or you want to track movement. GPS receiver error and movement detected while capturing data will show up in the mapped line.
Learn how to add a line to a map:
Use Manual to Add a Line
To use Manual to add a line to a map,
- Open the project in Map View.
- If using GPS, verify the GPS connection. Zoom to your position by tapping the center the GPS icon on the left side of the screen.
- Tap .
- From the Select Record Type dialog, tap the line record type.
The name of the line record type depends on how your project was set up.
- Select Manual.
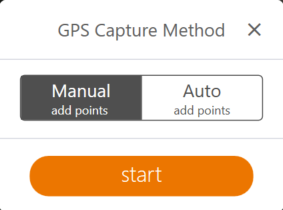
- Tap Start.
- Use one of the following methods to add the line.
| Add a Line Manually | |||
| To | Work Location | Requires GPS? | Steps |
| Add a line with GPS accuracy | Field | Yes |
|
| Add a line using a mouse | Office | No |
|
| Add a line using the target function | Field or Office | No |
|
Note: To add a point while adding the area, tap and add the point record. Then, continue mapping the area.
- At the end of the line, tap Finish.
- Enter information about the line, such as name and description.
- Tap Save.
Use Auto to Add a Line
To use Auto to create a line on a map,
- Open the project in Map View.
- Verify the GPS connection.
- Zoom to your position by tapping the center the GPS icon on the left side of the screen.
- Tap .
- From the Select Record Type dialog, tap the line record type.
The name of the point record type depends on how your project was set up.
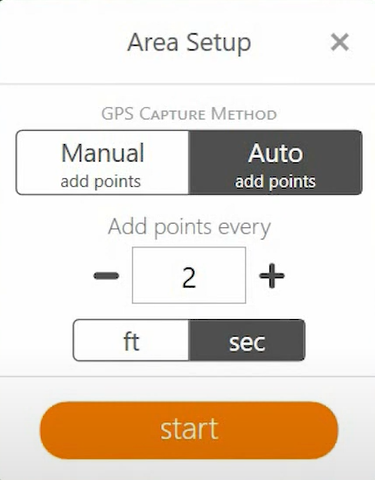
- Tap Auto.
- In Add points every, enter the time or distance interval at which you want Uinta to mark points in the area.

- Tap Start. Uinta marks your path as you move.
Note: To add a point while adding the area, tap Pause. Then, tap and add the point record. When you finish, tap Resume.
- At the end of the line, tap Finish.
- Enter information about the line, such as name and description.
- Tap Save.
Add an Area
You can map an area (or polygon) with at least three points in Uinta using the Manual or Auto feature:
- Manual—Allows the user to determine when to add points to the area. Works well for mapping areas with straight sides, such as a triangle, square, or rectangle-shaped area. For example if you are mapping a square area, you can add a point at each of the corners for a clean-looking square.
- Auto—Automatically adds points to the area boundary at a user-defined time or distance interval, similar to a track log. Works well for mapping areas that have curves or an irregular boundary. GPS receiver error and user movement will show up in the mapped area.
Learn how to add an area to the map:
Use Manual to Add an Area
To add an area with Manual,
- Open the project in Map View.
- If using GPS, verify the GPS connection.
- Tap .
- From the Select Record Type dialog, tap the area record type.
The name of the area record type depends on how your project was set up.
- Select Manual.
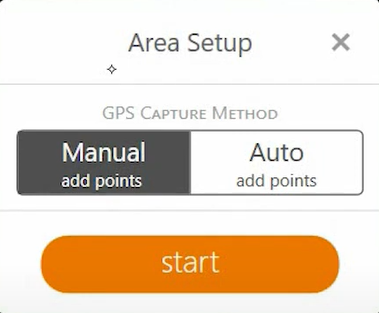
- Tap Start.
- Use one of the following methods to add an area to the map.
Add an Area Manually To Work Location Requires GPS? Steps Add an area with GPS accuracy Field Yes - To add the first point in the area, stand on a perimeter of the area and tap Add.
- Move along the perimeter. Tap Add each time you want to place a point.
- After you map the area, tap Finish.
Note: To add a point while mapping an area, tap
and add the point record. Then, continue mapping the area.Add an area using a mouse to place the points Office No - On the left side of the screen, select the mouse icon
 . Once selected, the icon will turn orange.
 - Use the mouse to position the point on a perimeter of the area and click.
- Move the mouse and click each time you want to add a point to the area.
- After you map the area, tap Finish.
Add an area using the target function Field or Office No - On the left side of the screen, select the target icon
 . Once selected, the icon will turn orange.
 - Position the target over the first point in the area. Tap Add.
- Move the target and tap Add each time you want to add a point to define the area.
- After you map the area, tap Finish.
- Enter additional information about the area, such as name and description.
- Tap Save.
Use Auto to Add an Area
To add an area with Auto,
- Open the project in the Map View.
- Verify the GPS connection.
- Tap .
- From the Select Record Type dialog, tap the area record type.
The name of the area record type depends on how your project was set up.
- Select Auto.
- Enter the distance or time interval at which Uinta should mark GPS points in the area.
- Tap Start.
- Move along the boundary of the area.
Note: To add a point while mapping the area, tap Pause. Then, tap and add the point record. When you finish, tap Resume.
- After you return to the starting point, tap Finish.
- Enter additional information about the area, such as the name and description.
- Tap Save.
Navigate to a Geospatial Record
With a GPS connection, Uinta can help you navigate to a geospatial record in your project. Uinta's navigation is only as accurate as your GPS receiver.
Learn how to navigate to a geospatial record:
To navigate to a geospatial record,
- Open the project in Map View or List View.
- Tap the point, line, or area to which you want to navigate.
Uinta displays information about the object.

- Tap Navigate.
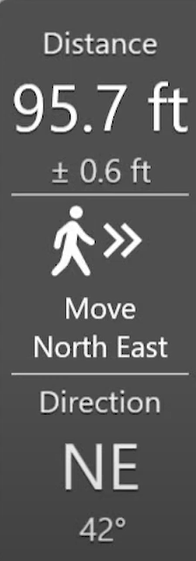
The Navigation toolbar is divided into three sections:
- Top—Distance to the selected point. The error margin displayed below the distance is determined by the accuracy of your GPS receiver.
- Middle—Direction which you need to move. When you start moving, Uinta detects your movement from the GPS receiver and a directional arrow appears. If you stop moving, this changes to a text description of the direction.
- Bottom—Cardinal direction.
Some additional icons are available while in navigation mode.
Windows—Select the center to GPS icon to track your GPS position on the map. When selected, the icon is orange ![]() . (Zooming or panning the map deselects the center to GPS icon.) Tap the compass icon
. (Zooming or panning the map deselects the center to GPS icon.) Tap the compass icon ![]() to toggle between Course Up and North Up navigation methods.
to toggle between Course Up and North Up navigation methods.
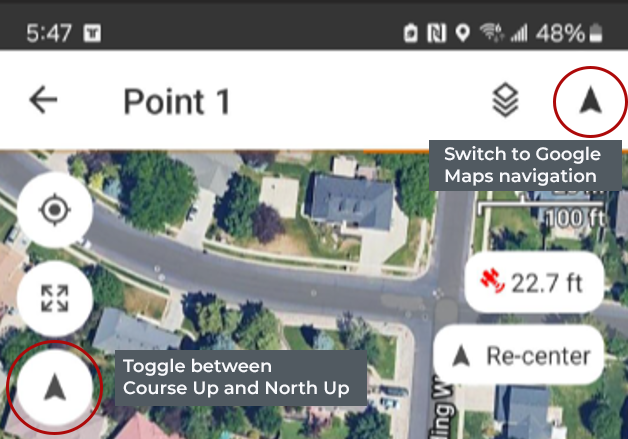
Android and iOS—Tap the compass icon ![]() on the left side of the screen to toggle between Course Up and North Up navigation methods. Tap the compass icon
on the left side of the screen to toggle between Course Up and North Up navigation methods. Tap the compass icon ![]() in the top right corner to switch to Google Maps navigation.
in the top right corner to switch to Google Maps navigation.
- Use the Navigation toolbar to help you navigate to the destination.
Move slowly as you get close to your destination. With a high accuracy GPS receiver, you can easily pass by your target.
Note: The update rate for your GPS receiver affects the Uinta GPS position and map during navigation. For example, a 1 Hz update rate works well for navigating at walking speeds. However, if you are moving at a higher speed, such as in a vehicle, then a GPS receiver with a faster update rate (for example, 10 Hz) may result in a better navigation experience. Contact Juniper Systems technical support with questions. - When you reach your destination, the Navigation toolbar turns green and displays "Arrived."
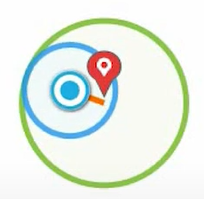
Windows—The navigation switches to a leveling bubble to allow for more precise navigation with a high accuracy GPS receiver. A green circle marks the target point. The diameter of the circle is determined by the Estimated Horizontal Error (EHE) value in Location Settings. (The default value is .5 m.) A blue circle marks the GPS position. The radius of the circle is the GPS estimated EHE.
- Move the GPS receiver to find the most accurate position.
- To exit Navigation mode, tap End Navigation.