Modify Settings
This section covers how to change the application preferences and set the project storage location.
Change Application Preferences
Application preferences are set on your device and apply to all users who sign into that device. In Preferences, you can modify the unit system, customize the Map View preferences, and set the cloud sync behavior.
To modify the application preferences,
- From the menu, select Settings > Preferences.
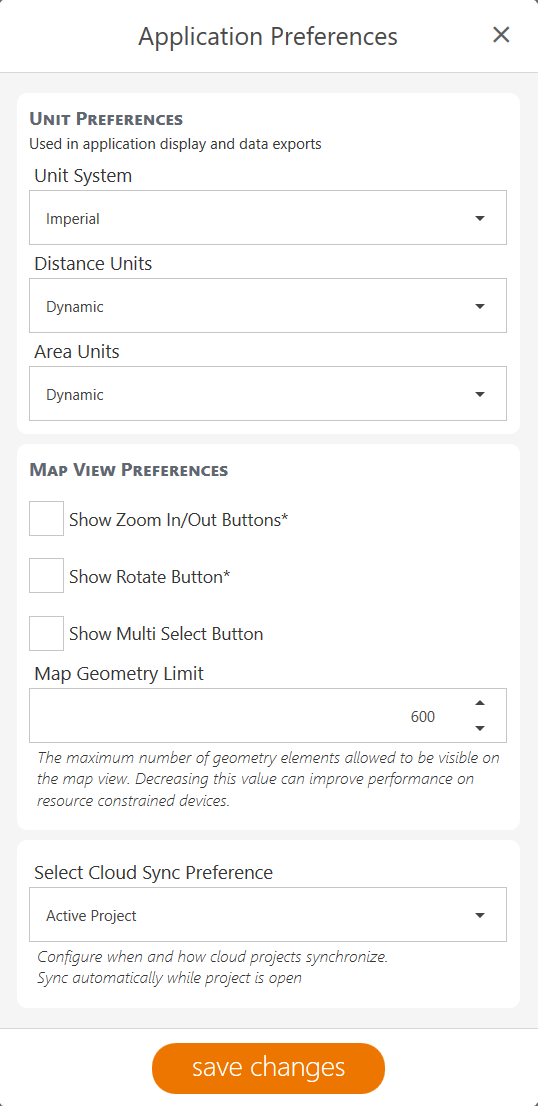
- Modify the following settings.
| Application Preferences | |
| Field | Setting |
| Unit system | Select Imperial or Metric. The unit preferences appear in the application display and data export. |
| Distance units |
|
| Area units |
|
| Show Zoom In/Out buttons | Select this option to show the Zoom In/Out buttons on the Map View screen. |
| Show Rotate button | Select this option to show the Rotate button on the Map View screen. |
| Show Multi Select button | Select this option to show the Multi Select and Area Select buttons on the Map View screen. |
| Map geometry limit | Enter the maximum number of geometry elements that can be visible on the map. Decreasing this number can improve performance on resource-constrained devices. |
|
Select cloud sync preference |
Select Manual, Active Project, or Background sync. For more details on each setting, see Set Cloud Sync Preferences. |
- Tap Save changes.
Set Project Storage Location
To set project storage location,
- From the menu, select Settings > Advanced.
- To set the projects folder, tap Browse in Project Folder. Locate the desired storage folder and tap Select Folder.
- To set the local documents folder, tap Browse in Local Documents Folder. Locate the desired storage folder and tap Select Folder.
- Tap Save to save your settings.
To undo the customized settings, tap Reset to Defaults.