Set Up Geode Connect for Windows
As a configuration and communication utility for the Geode GNS3 GNSS Receiver, Geode Connect provides you with the ability to establish communications with the Geode; change receiver settings; and view position, altitude, estimated horizontal error, differential status/fix information, speed, heading, satellites in fix, correction signal, and PDOP.
This chapter gives an overview of the features included in Geode Connect for Windows PC. It gives details about specific settings that can optimize the Geode’s precision, accuracy, and reliability, depending on the situation and environment. It also gives specific instructions about the nuances of using the Geode with the Windows operating system and third-party apps.
Download and Install
Geode Connect is available for download on the Juniper Systems webpage.
To download and install Geode Connect,
- Go to www.junipersys.com/support/geode/downloads.
- Select Geode Connect for Microsoft Windows PC.
- Download the .exe file and follow the instructions on your device to install the app.
Connect with the Geode
The Geode connects with Windows PC devices via Bluetooth wireless technology, USB, and RS-232C cable.
Pair via Bluetooth
To pair via Bluetooth,
- Power on the Geode.
- Make sure Bluetooth wireless technology is enabled on your Windows device.
- Pair the Geode to your Windows device.
- Open Geode Connect.
- If the device has connected to a Geode previously, tap the Geode name at the top of the screen.
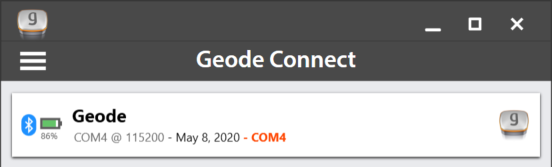
The app will ask you what you would like to do.
Note: If the device has not previously connected to a Geode, the app opens the Device Setup screen.
- Tap Change Device. This opens the Device Setup screen.
The app will display a list of local wireless devices. Identify your Geode via the serial number printed on its bottom panel. Select the name of the Geode you want to pair with.
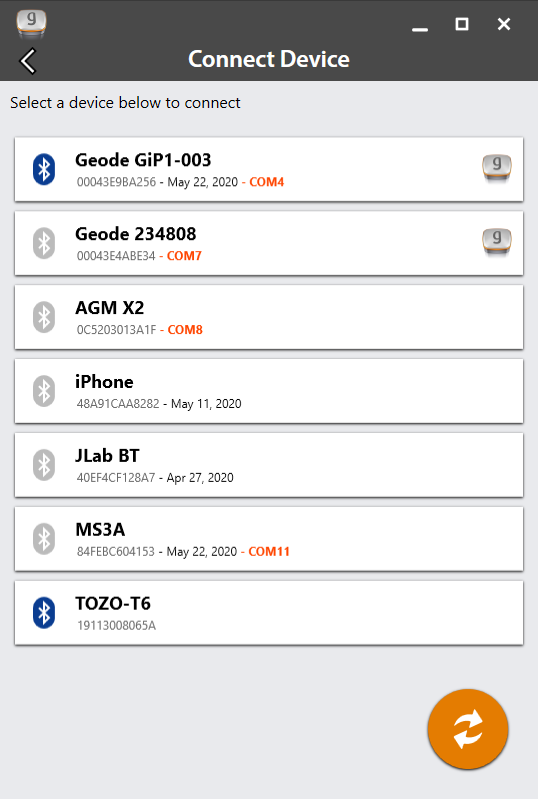
Note: If your Geode doesn’t show up in the list of devices, check to make sure it is turned on and not paired with another device. Then, tap the refresh icon ![]() .
.
- Follow the prompts to finish pairing the Geode with your device.
- If prompted by your device, enter the Pair code: 0000.
The Geode should now be connected to your Windows device.
Troubleshooting a Windows PC Bluetooth Connection
Sometimes when a Geode has been paired with a Windows PC device and then is paired with several other devices, the Geode may have trouble re-pairing with the original Windows PC device.
If this happens, the following prompt appears.
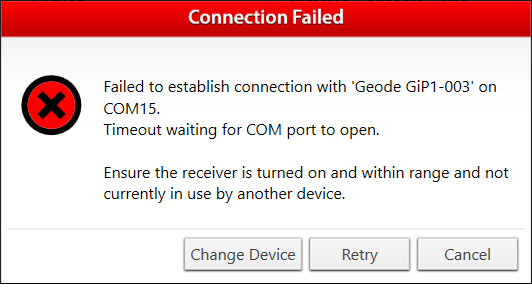
- Select Retry.
This may fix the connection. If not, Geode Connect will display the following:

- Select Repair.
Geode Connect will attempt to repair the connection.
If Geode Connect is unable to repair the connection, you may need to turn the Geode off and on again and/or go to Windows Settings and select Forget Device for the Geode you are trying to pair. After doing so, return to Geode Connect and begin the pair sequence for a Bluetooth connection again.
Connect via USB
The Geode can connect with a Windows PC or handheld tablet—such as the Juniper Systems Mesa tablets—using the supplied USB cable.
To connect via USB,
- Ensure your Windows PC or tablet is in Desktop mode, not Tablet mode.
- Power on the Geode before you plug it into your device.
- Plug the USB cable into your device and the Geode.
Note: This may cause the red LED Status Indicator to flash rapidly on the Geode because there is not enough power in the PC or handheld device to charge the Geode. This does not affect the data transfer between the Geode and the device.
- Open Geode Connect.
If the device has connected to a Geode previously, tap the Geode name at the top of the screen.
The app will ask you what you would like to do.
Note: If the device has not previously connected to a Geode, the app will immediately open the Device Setup screen when you open the app.
- Tap Change Device. This opens the Device Setup screen.
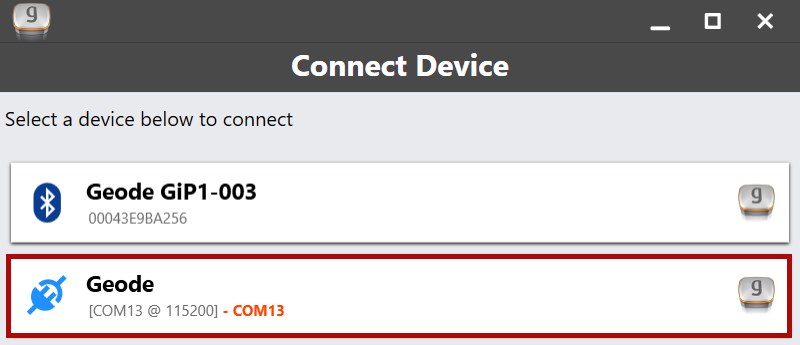
- Geode Connect displays a list of local wireless and connected devices. It may list the same Geode twice, once as a Bluetooth wireless device and once as a physically connected device. The Geode connected via USB will have a plug icon
 next to it. Select this Geode.
Note: If your Geode doesn’t show up in the list of devices, check to make sure it is turned on and not paired with another device. Then, tap the refresh icon ![]() .
.
For subsequent connections, the Geode may connect to the same device using a different COM port. This is normal.
Connect via Serial Port
The Geode has a 9-pin RS-232C serial port. This allows the Geode to be mounted to a piece of equipment while maintaining a constant connection for data and power. Use a straight-through 9-pin cable to communicate with the Geode. For a list of functions for each pin, refer to Appendix A: Serial Port Configuration.
To communicate between a PC and a Geode over a straight-through serial cable,
- Open Geode Connect.
If the device has connected to a Geode previously, tap the Geode name at the top of the screen.
The app will ask you what you would like to do.
Note: If the device has not previously connected to a Geode, the app will immediately open the Device Setup screen when you open the app.
- Tap Change Device. This opens the Device Setup screen.
- The app will display a list of local wireless and connected devices. It may list the same Geode twice, once as a Bluetooth wireless device and once as a physically connected device. The Geode connected via serial cable will have a plug icon next to it. Select this Geode.
Note: The name displayed for a serial connection in this list will not include the serial number of your Geode.
Note: If your Geode doesn’t show up in the list of devices, check to make sure it is turned on and connected to your device. Then tap the refresh icon ![]() .
.
The Geode will then connect to the host device.