Add Layers
In Uinta, a map can consist of three types of layers: record types, reference layers, and online base map. The online base map is the foundation for the project, and the other layers build upon the base.

- Record Types―This is the layer on which you place points, lines, areas, and non-spatial records. For instructions on adding record types, see Collect Data with Uinta.
- Reference Layers―Reference layers overlay the base map and provide additional detail, such as property boundaries, tax parcels, wetlands, or topography. These layers are optional and can be turned on or off as needed. They can be saved to the cloud for access by anyone with project permissions or downloaded to your local device for offline use. Reference layer data cannot be edited but the formatting can be customized.
- Online Base Map―The base map comes from a mapping service and is not editable. You can search the limited metadata available with the base map. It can be turned off to view only the visible reference layers.
Use External Images for Reference Layers
Reference layers come from imported raster or vector images.
- Raster images, built from a grid of pixels, are imported as non-editable layers. The image resolution is determined by the number of pixels and increasing the size of the image can lead to a loss of quality.
- Vector images use mathematical formulas to create shapes, borders, and fill colors and can be scaled to any size without losing quality. These layers are editable and searchable, but the geospatial data cannot be modified.
The following table shows the raster and vector file types that can be imported into Uinta.
| Raster File Types | Vector File Types |
|---|---|
| GeoTIFF (.tiff) * | Google Earth (.kml/.kmz) |
| MBTiles (.mbtiles) | Shapefile (.shp) |
| GeoPKG (.gpkg) | |
| GeoJSON (.geojson) | |
| CSV (.csv) |
* To be used as a reference layer, a GeoTIFF file must be geo-referenced. Uinta will notify you if a GeoTIFF file lacks the necessary metadata.
Raster images can be directly imported as reference layers across all Uinta platforms (Windows, Android, and iOS). In contrast, vector images can only be imported as reference layers using Uinta for Windows. During the import process, Uinta converts vector images to MBTiles, and when saved to the cloud, these reference layers can be used across all platforms.
When to Import a Vector Image as Reference Layer
| Import a Vector Image as | When |
|---|---|
|
A reference layer |
You want to view and filter the file's geospatial data but do not need to edit the data. This method works well for large vector files with lots of geospatial data. See Import a Reference Layer. |
|
Editable records |
You want to add the file's geospatial data to a new or existing project and have the ability to edit the data. See Import Data. |
File Size Limits
When importing reference layer images, you can save them locally or upload them to the cloud. File size recommendations vary by format and storage location:
MBTiles format—
- Local storage: Limited only by your device's storage capacity
- Cloud upload: Must be less than 300 MB
GeoTIFF format—
- Local storage: Less than 40 MB for efficient device performance
- Cloud upload: Must be less than 40 MB
Uinta prevents you from uploading images to the cloud that exceed the recommended size limit. No warning appears for oversized files saved to your device.
Sources for Reference Layer Imagery
There are many sources, both public and private, for reference layer imagery. The following table includes some public resources.
|
Public Sources |
Available Imagery |
|---|---|
|
U.S. Geological Survey (USGS), TopoView: https://ngmdb.usgs.gov/topoview/ |
Topography Aerial imagery Note: For instructions on downloading USGS imagery and maps, see Using USGS Topography Maps & Aerial Imagery as Reference Layers. |
| U.S. Geological Survey (USGS), National Map Download Application: https://apps.nationalmap.gov/downloader/ |
Topography Aerial imagery Topobathy, elevation Hydrography Transportation Elevation Boundaries Structures Geographic Names Information System (GNIS) Woodland tint |
|
Local GIS websites, such as county, state, and federal
|
Tax parcels Wetlands Flood plains Trails Plats Topography Aerial imagery Roads Utilities |
Private sources of imagery include drone-captured imagery and the exported files from sensor-based surveys, such as Ground Penetrating Radar (GPR).
Import an Image as a Reference Layer
Raster images can be directly imported as reference layers across all Uinta platforms (Windows, Android, and iOS). In contrast, vector images can only be imported as reference layers using Uinta for Windows. During the import process, Uinta converts vector images to MBTiles, and when saved to the cloud, these reference layers can be used across all platforms.
To import a reference layer,
- Open the project in Map View.
- Tap
 .
. - Tap Import layer.
- Tap Reference layer.
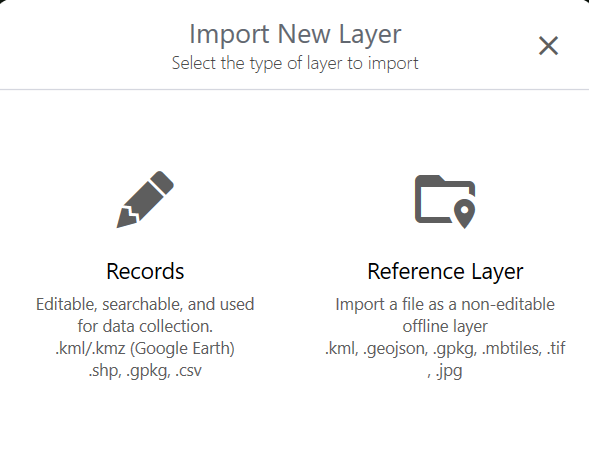
- Locate and select the file that you want import. Tap Open.
- If you are importing the reference layer to a cloud project, select the storage location.
- Select Upload to cloud to save the reference layer to cloud storage and make it available to other Uinta users and devices. (Optional) Select Make layer required to have Uinta automatically download and enable the layer for all project users.
- Select Keep local to save the reference layer to your device. The layer is only available from this device.
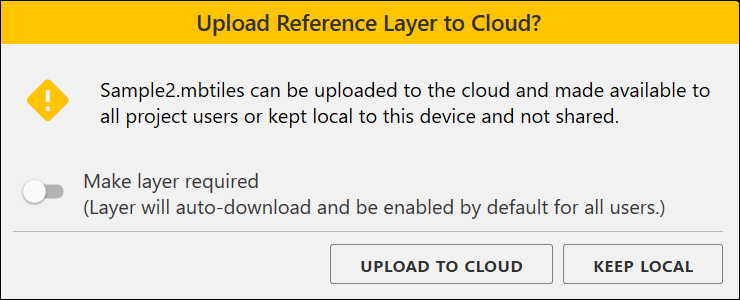
Uinta notifies you after the layer is successfully added to the project.
- Return to the map.
Add a Reference Layer to the Cloud
Adding a reference layer to the cloud makes the layer accessible to anyone with access to the project.
To move a reference layer to the cloud,
- Tap
 .
. - Expand Reference Layers.
- Tap Manage Reference Layers.
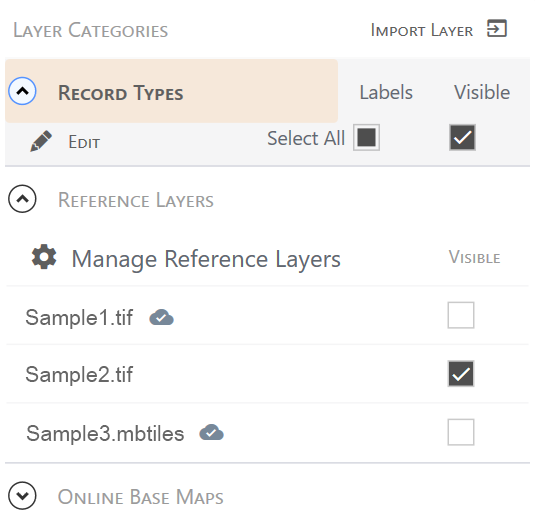
- Select the layer and tap
 .
. - From the menu, select Upload to cloud.
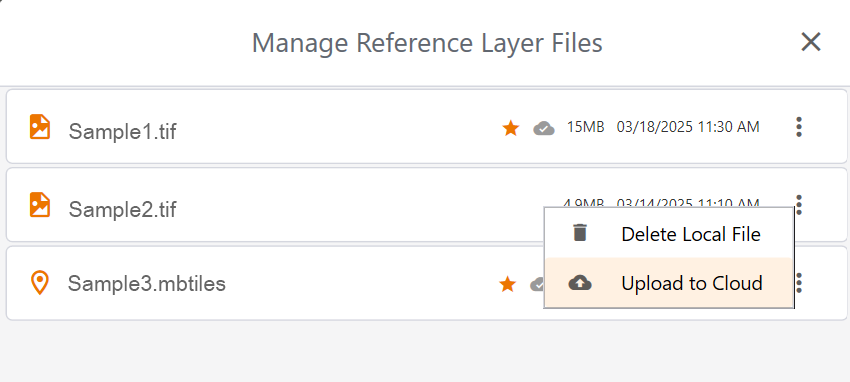
- (Optional) Select Make layer required to automatically download and enable the layer for all project users.

- Tap Upload to cloud. Uinta notifies you after the layer is successfully uploaded to the cloud.
- Return to the map.
Delete a Reference Layer
To delete a reference layer,
- Tap
 .
. - Expand Reference layers.
- Tap Manage reference layers.
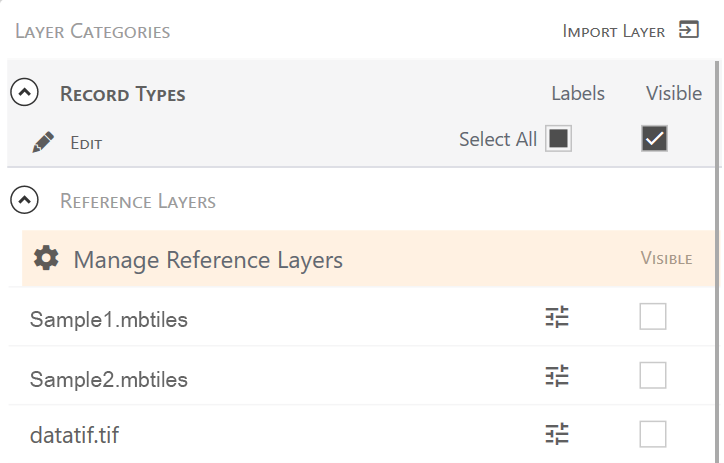
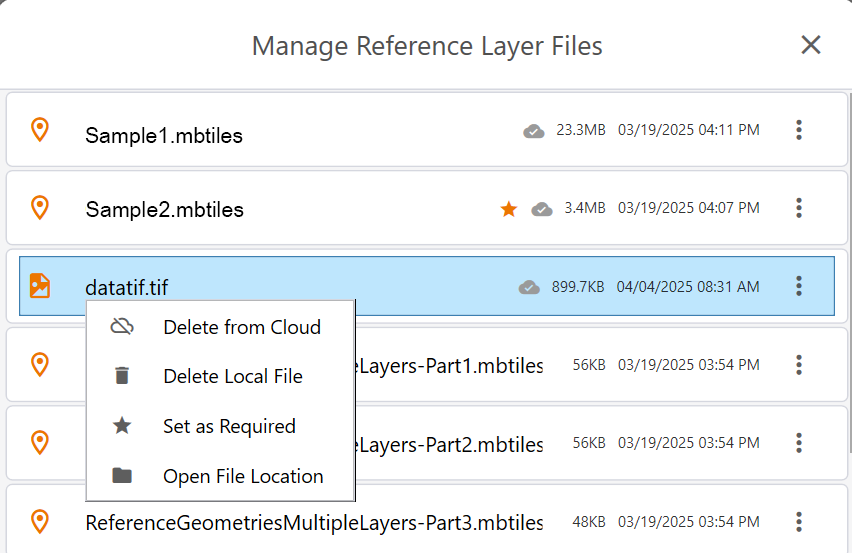
- Select the layer that you want to delete, and tap
 .
. - From the menu, select
- Delete from cloud—Removes the reference layer from the cloud. The layer will still be available on any devices on which it has been downloaded as a local file. Select Yes, delete file from cloud to confirm the deletion.
- Delete local file—Removes the reference layer from your local device. The layer may still be available on the cloud for other project users. Select Yes, delete local file to confirm the deletion.
- Return to the map.
Mark a Reference Layer Required or Optional
You can designate a reference layer saved to the cloud as required or optional.
- Required layer―Automatically downloads for all project users
- Optional layer―Available to download from the cloud for all project users
To set a layer as required or optional,
- Tap
 .
. - Expand Reference layers.
- Tap Manage reference layers.
- Select the layer and tap
 .
. - From the menu, select Set as required or Set as optional.

- Return to the map.
Set Reference Layer Visibility
To set the visibility of a reference layer,
- Open the project in Map View.
- Tap
 .
. - Expand Reference layers.
- Select or clear the Visible checkbox next to a layer to show or hide it.
In Windows, visible layers automatically move to the top of the list.
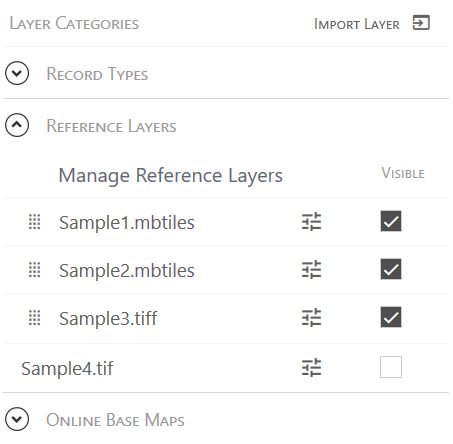
- Sort the active reference layers to optimize visibility.
- Windows―Drag the visible reference layers into the desired order.
- Android and iOS―Tap Order layers. Select a layer, and tap Up or Down on the toolbar to move the layer.
- Return to the map.
Customize a Reference Layer
The extent to which you can customize a reference layer depends on the source file.
- Raster images have the file format .mbtiles or .tiff. You can adjust layer opacity (both file types) and move the X and Y offsets (.tiff layers only). Because the images contain no geospatial data, filtering layer data is not an option.
- Vector images imported into Uinta are converted to the file format .mbtiles and retain their geospatial data. You can adjust the layer opacity, customize the layer style, and filter the layer data.
Change Opacity of a Reference Layer
You can change the transparency of a reference layer by adjusting the opacity.
- Tap
 .
. - Expand Reference layers.
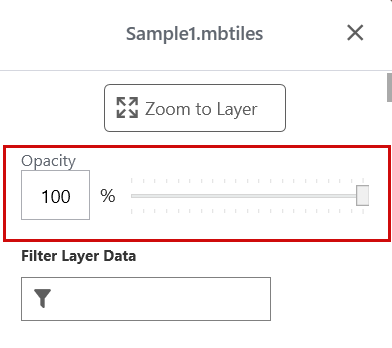
- Tap
 next to the layer you want to modify.
 - Move the Opacity slider to adjust the layer's transparency. The lower the opacity percentage, the more transparent the layer.
- Tap
 to save your changes.
 - Return to the map.
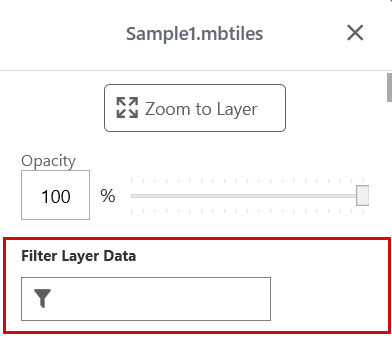
Filter Layer Data
If the reference layer was imported from a vector image, the layer may contain additional geospatial data that can be searched.
To filter the layer data,
- Tap
 .
. - Expand Reference layers.
- Tap
 next to the layer you want to modify.
 - In Filter Layer Data, enter the search criteria and press Enter.
- Tap
 to save your changes.
Uinta shows only the data that matches the search criteria.
- Return to the map.
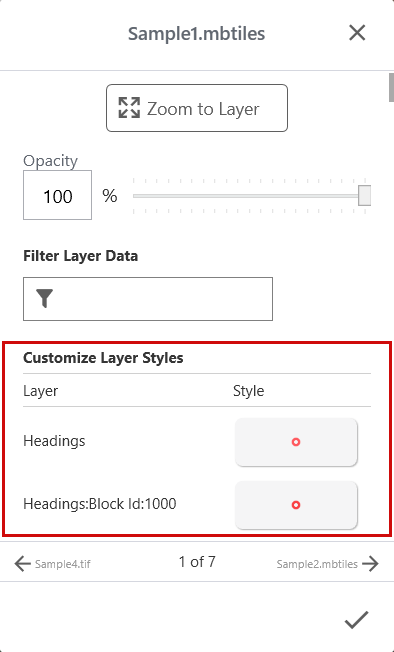
Customize Layer Styles
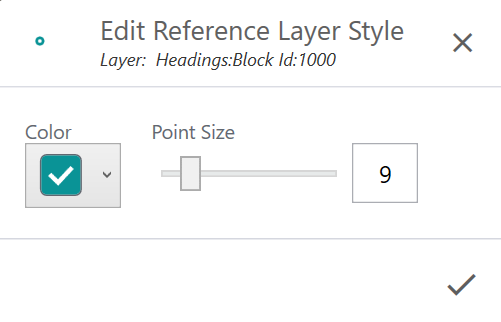
If the reference layer was imported from a vector image, you can customize layer styles assigned to the geospatial data.
- Tap
 .
. - Expand Reference layers.
- Tap
 next to the layer you want to modify.
 - In Customize Layer Styles, select a style.
- Adjust the layer attributes.
- Tap
 to save your changes.
 - After you finish, tap
 to save your changes.
 - Return to the map.
Adjust the X/Y Offset for GeoTIFF Layer
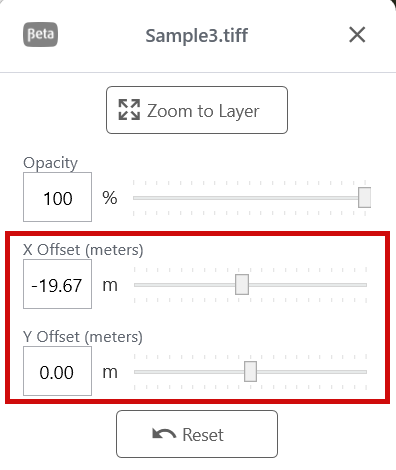
You can adjust the position of a GeoTIFF reference layer relative to the base map by moving the X and Y offsets.
- Tap
 .
. - Expand Reference layers.
- Tap
 next to the GeoTIFF layer that you want to modify.
 - Drag the X Offset and Y Offset sliders to adjust the position of the layer.
- Tap Reset to return the X and Y offsets to the original settings.
- Tap
 to save your changes.
 - Return to the map.
Zoom to Layer
To focus the map on a reference layer,
- Tap
 .
. - Expand Reference Layers.
- Tap
 next to the layer you want to view.
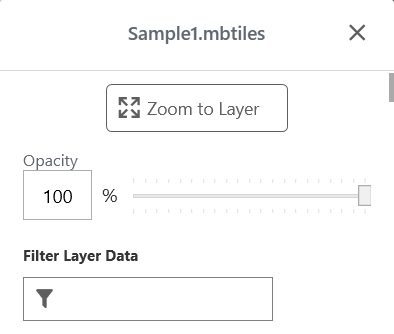
- Tap Zoom to layer.
Save a Map Region as a Reference Layer
In Uinta for Windows, you can save a selected map region as a reference layer for offline use. If you save the layer to the cloud, it becomes accessible for all project users.
Note: This feature is not available if the online base map uses Google Maps.
To save a map region as a reference layer,
- Tap
 .
. - Expand Reference layers.
- Tap Manage reference layers.
- Tap Create new.

- Zoom in or out as needed to fit the desired region of the map in the selection area.
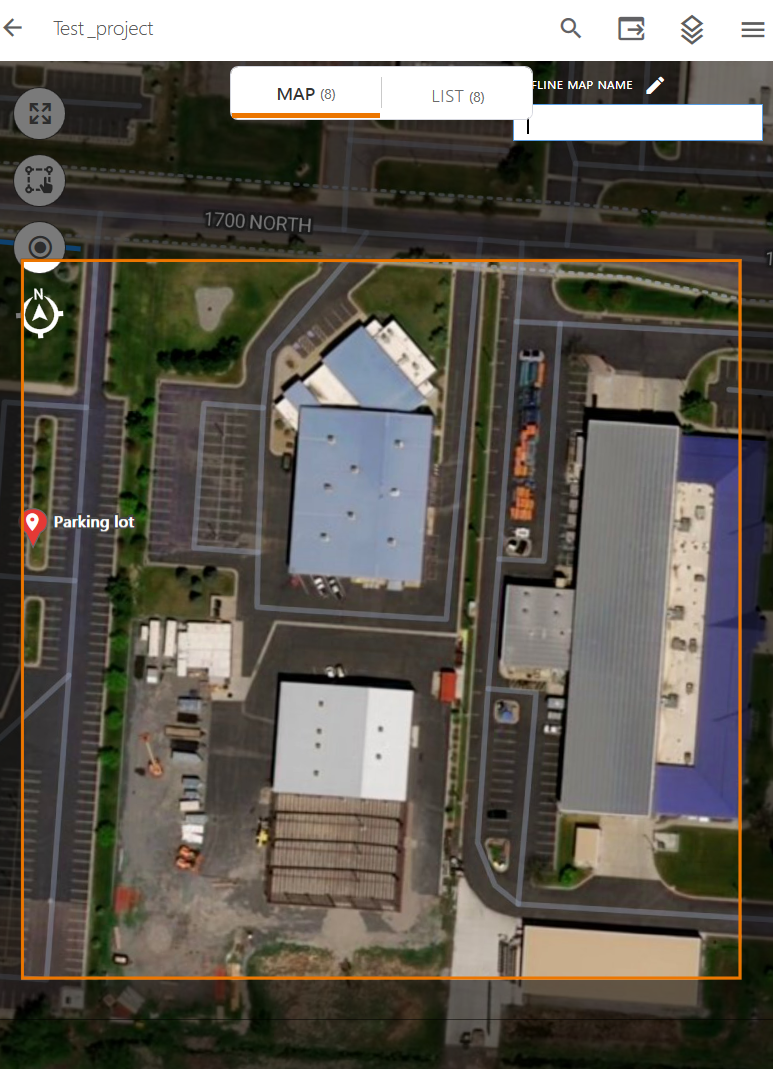
- In Offline map name, enter the name for the reference layer.
- Tap Download. The reference layer is saved to your hard drive in Documents\Uinta\Offline Maps.